Residential Painting – Tips and Techniques to Resolve Painting Troubles
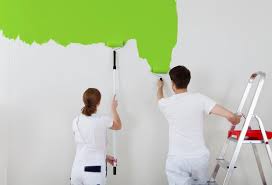
Residential painting is another term for home painting. Professional house painters like us are experts to painting the exterior and interior of single family homes. Whenever you hire a us, you can rest easy knowing that a group of painters will work hard to improve your home with aesthetic and structure. Not only are we capable to change the look and texture of your house, but we can cater services to you or your family’s needs as you stay in your home.
Techniques That Makes a Professional Residential Painter
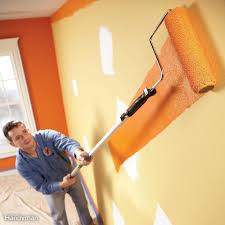
Along with an eye for details, professional painters have special techniques they use to ensure the best possible paint job occurs when painting your home. People may believe that these techniques are secret that professionals learn in training, but they are everyday techniques that non-professionals can do too. Some techniques include:
- Sanding away imperfections before painting. Starting with a perfectly smooth wall will help to have a perfectly painted wall with no lumps and bumps.
- Using tape to cover areas you don’t want to get paint on. This is a standard practice to use on baseboards, but it can also be used to create painting patterns on walls.
- Pressing the tape down with a putty knife to reduce air bubbles. Nothing is worse than finishing a paint job, thinking it all went well, then when you go to peel the paint off the baseboards you find that some paint bled through. Pushing it down with a putty knife ensures that nothing bleeds through.
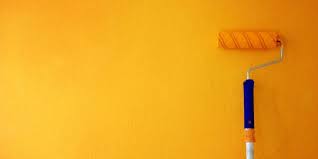
- Using paint extender to eliminate brush strokes. Paint extender, also known as paint conditioner, slows down the drying time for paint which allows you to put more than one coat on and not get a slew of different brush strokes.
Common Paint Problems & How to Fix Them
Learn what causes the peskiest paint problems—and how to fix and avoid them in the future.
Cracking, Flaking, and Clumping
Repair and Prevention: If damage is extensive, you may need to repaint the entire surface. If not, with the right technique, you can repair a poorly painted spot without a lot of headache. Follow the tips detailed below for solutions.
- Remove all cracked and flaking paint with a scraper, wire brush, heat gun, or chemical application (depending on the extent and severity of the problem).
- Sand, feathering the edges to blend, then clean and prime the surface.
- Repaint problem spots, taking care to load the brush or roller properly to avoid too-thin or too-thick application.
- For brush application, dip the brush in, allowing paint to cover up to one-third of the bristle length; tap the brush lightly on both sides and avoid dragging the brush against the edge of the container.
- If using a roller, fill the roller tray halfway. Remove lint from a new roller cover, dip the roller into the well of the tray, then over the ribbed portion of the tray, repeating several times to evenly distribute the right amount of paint.
Alligatoring and Checking
Repair and Prevention
- Remove the old paint, then sand, prime and repaint with a flexible latex-based paint.
- Use high-quality latex paint.
Efflorescence
Repair and Prevention
- If moisture is getting into the masonry wall, eliminate the source of moisture by properly tuckpointing any cracks or missing mortar in the wall or patching concrete with a latex concrete patch; clean out gutters and downspouts, and caulk joints around windows and doors with a butyl rubber caulk.
- If moisture is migrating through the wall from the outside (e.g., basement wall), apply waterproofing to the outside of the wall.
- Remove all efflorescence and any loose flaking, chalking paint with a wire brush, scraping, or power washing. Then clean the area with a trisodium phosphate cleaning solution and rinse with clean water. Let completely dry, then paint with a high-quality latex house paint.
FROSTING- How to Fix It
Once property owners take preventative steps, they can progress to repairs. As distressing as the appearance of these marks may be, frosting damage can be surprisingly simple to remedy with the right tools.
- For mild frosting issues, gently wash the affected surfaces with warm water to test the deposited crystals for water solubility. If the marks dissolve after applying water, repeat this process until any flaws disappear.
- Stubborn cases may require the use of soft brushes for gentle clearing of heavy deposits. Once excess material is cleared, clean the affected areas.
- Apply quality alkyd primers to the exposed surfaces. These primers adhere well to a wide variety of surfaces, including wood.
- Once the primer cures, retouch the damaged areas with a matching paint.