How To Start A Post Construction Cleaning Business

Why is post construction cleaning important?

Post construction dust and dirt can be harmful to the health of the building’s occupants and it is quite often difficult to remove. Post construction cleaning requires specialized equipment, products and expertise to effectively remove the airborne dust particles and residue that settles everywhere after construction and renovation, including on furnishings, carpet, wall hangings, windows and fittings, sanitary fittings, walls, hard surfaces and tile floors.


Benefits Of Post-Construction Cleanup

Anyone who’s gone through a major home renovation knows how stressful it can be. You have to spend a lot of time determining what needs to be done and what company is best for the job. But even once the project is all said and done, you’ll be left with a major cleanup job on your hands. Sometimes, you may not even know what to do with all the debris and junk that’s left in your home.

It’s Cost-Effective

Plain and simple, it is more cost-effective to choose us. Why? First of all, many cleaning and janitorial companies understand the need for this service and will charge a pretty penny for it. We keep our prices fair so that you always have someone to rely on. We also work quickly, ensuring that you never miss a beat and your company can get back to what it was doing.

We’re Efficient

Efficiency is key when it comes to construction clean up. We understand that the sooner post-construction junk is removed from your office or home, the sooner you can get back to what you were doing.

Safety

Dealing with a post-construction cleaning project on your own can be seriously risky. Oftentimes, you’ll have to watch out for sharp objects or breathe in sawdust or other airborne allergens. Our expert cleaners know how to get in and get out without taking any unnecessary safety risks. We work with an attention to detail so that you’ll be left with a clean and healthy home or office once we’re gone.


What is commercial post-construction cleaning and what does it include?

Commercial post-construction cleaning means putting a commercial property into appropriate condition for occupation and use after a construction, remodeling, or renovation project.

Most often it’s performed by janitorial companies for commercial property owners who are going to start using the building. As advised by PropertyCashin in their guide to selling a commercial property, it’s also an important step in preparing a building to advertising and showings.

Thorough post construction cleaning often times helps property owners to significantly increase their property’s value, which is why post construction cleaning is one of the integral pre-selling activities every real estate professional follows.


Debris Removal

The debris that needs to be removed from the site can be:

  • Hazardous waste.
  • Non-hazardous waste.

Check with the dumpster (roll-off) provider to determine what types of construction debris are not accepted at the landfill. As an example, open paint cans with dried paint are generally acceptable while any undried coatings are treated as hazardous waste.

A backhoe can significantly decrease the amount of time needed for the cleanup of exterior debris. A tilting dump waste cart is a convenient way of getting interior waste outside and into the backhoe bucket.

Disposal of Hazardous Waste

The most important consideration when cleaning up hazardous waste is the current safety of the cleanup personnel and the future safety of the building’s occupants. Make sure that all cleanup personnel use approved safety equipment at all times. Equally important, ensure that no hazardous material is left behind to endanger the health of future occupants.

Each type of hazardous waste can have different means of disposal. For instance, asbestos (properly contained) can be buried in some landfills, whereas hazardous liquids are usually incinerated. Contact your local DNR (Department of Natural Resources) for the right disposal facility.


Cleaning up Construction Dust

Construction dust consists of, but is not limited to:

  • Sawdust
  • Asbestos fibers
  • Metal filings
  • Drywall dust
  • Cement products

While sawdust is not as hazardous as asbestos fibers, protect the cleanup crew from any type of dust.

When dust cleaning, having the wrong filter on vacuum equipment is a commonly overlooked problem. For example, the typical shop vacuum bag will not filter out drywall dust. So instead of removing drywall dust, it recirculates the dirty air throughout the building.

For the health of building occupants, clean the HVAC ducts as a part of the deep clean of the interior. Even if the building had temporary heating during construction, dust still accumulates in the ductwork.

Make sure to clean the dust that has settled on ceiling light panels in suspended ceilings. Otherwise, a layer of dirt can reduce the lumen output of lighting fixtures.

Types Of Hot Water Heaters

Water Heater Repair & Replacement

Is Time to Replace Your Water Heater?

Ask yourself the following questions and if the answer to any is “yes,” then it may be time to consider installing a new water heater in your home before your current one breaks down:

Is your water heater over 10 years old?

Is your water occasionally coming out rust-colored?

Do you hear odd noises like banging, hissing, or popping sounds?

Can you see water leaking from your water heater?

While are proud of these numbers, it’s the level of performance at which operate and our ability to bring families and business owners the comfort and functionality they deserve in their property that really excites. Water heaters are essential to a fully functioning structure, and their importance prompted to specialize in their maintenance, repair, and installation.

You’ll come across plenty of “Jacks of all trades” that will do plumbing, HVAC, and water heater services, but we caution you to be wary of service providers who may be spreading themselves a little too thin


water heater

If you have questions about your water heater browse through our frequently asked questions or FAQ’s below to find an answer.

Why is the pipe on the side of my water heater leaking?

Most likely you are referring to the overflow pipe attached to the temperature relief valve on the water heater. This is a safety valve and helps relieve excess temperature and pressure inside the water heater in case of high pressure or an overheated water heater. Occasionally this pipe will “blow off a little steam” and there will be no problem with your water heater, but if it leaks frequently or continuously there may be a problem. Call and speak with one of our water heater experts and they can help determine if you have a problem.

I have no hot water and why won’t my pilot light?

The most common reason a pilot won’t light, is a bad thermo-couple or a faulty part inside the water heater. When this occurs most of the time a simple repair will fix the problem. See our No Hot Water Page for a video on how to light your pilot or possible trouble shooting ideas.

Why is there a water leak under my water heater?

Water heaters tend to leak for a few reasons. Most often the internal tank has a crack and is broken or there is a leak at a fitting or part connected to the water heater. First check to see if you can tell where the water is coming from. Look at the top of the water heater and see if it is wet or if one of the water connectors is dripping, a leak like this can usually be repaired. If you do not see any visible leaks,  but water is pooling around the bottom of the heater this is a sign the water heater has gone bad. See our Leaking Water Heater page for additional information regarding a leaking water heater.

Why do I not get enough hot water or as much hot water as I used to?

If you have an older water heater, you might have a sediment buildup problem inside your tank. As a water heater ages, it tends to accumulate sediment and deposits at the bottom. If the water heater is not cleaned periodically, the sediment may rise to a level that will act as a barrier between the burner and the water, making it harder to heat, thus giving you less hot water. There could also be a problem with a faulty part or a bad dip tube in the water heater. Also see our Not Enough Hot Water page for more information regarding not getting enough hot water.


Water Heater Services

Hot water is one of those things most people take for granted until they don’t have it. It becomes a habit to turn the shower on, wait a minute for it to warm, and hop right into a relaxing start to your day. Whenever a hot water tank breaks it is usually at the worst possible time and service is needed ASAP.

What’s Included in Water Heater Maintenance?

Replacing a hot water heater can be expensive. Ensuring it is well-maintained will help extend its life and lessen any problems that may pop up down the road

Here are a few steps a professional can take to keep your unit running efficiently for years to come:

TEST THE TPR VALVE- TPR stands for temperature-pressure-release. Testing this valve is a necessity to prevent pressure from building up and possibly exploding

CHECK THE ANODE ROD- this rod is important because it stops your water heater from rusting. They are designed to wear out faster than your water heater so changing them as needed is imperative

DRAIN THE TANK- this process will get rid of the sediment buildup in the tank. Sediment buildup causes the tank to work harder than needed which will cause early tank failure in addition to raising the cost to operate it

INSULATE THE TANK- opting to insulate the hot water heater tank will allow water to remain hotter which in turn allows you to lower the temperature setting. Again, this allows the hot water heater not to work as hard

When Should You Replace Your Water Heater?

Although it may seem like a hot water heater can last forever, it unfortunately cannot. Most people won’t consider replacing a hot water heater unless theirs is completely broken. However, if it is completely broken, the household will not have hot water

To avoid this gap in warm water, here are the key signs it is time to replace your water heater:

AGE- hot water heaters have a lifespan of about 8-10 years. After 10 years, replacing the water heater is necessary because it could break at any time and may be costing far more to operate than a newer, more efficient model

RUSTING- a rusty water heater is something that cannot be fixed. Once rust has taken hold, the unit needs and can even lead to water contamination

SEVERE SEDIMENT BUILDUP- having a severe sediment buildup in your water heater can make it far less efficient to run. Because more time is spent heating the water, the metal of the water heater tank will become brittle and cause cracks

WATER IS NOT HOT ENOUGH- if you’re constantly adjusting the temperature of your water heater, it might not have to do with the thermostat at all. There is a chance other parts could be broken, especially if your water heater is much older

TANK SIZE- growing families mean more hot water usage. Even if your hot water heater is in good condition, having a large influx of people or an increase in use in hot water might signal that it’s time to replace your hot water heater with a larger tank


THINGS YOU SHOULD KNOW ABOUT YOUR WATER HEATER

WATER HEATING ACCOUNTS FOR 18% OF HOME ENERGY USAGE

According to the US Department of Energy, about 18% of your home’s total energy use goes to heating the water. There are, however, steps you can take to keep energy and fuel usage manageable.

Turn down the temperature. You may be able to lower the settings from 140°F to 120°F.

Use less hot water. You can do your laundry on the cold setting and install low-flow fixtures to reduce hot water use and overall water use.

Upgrade your water heater. When your water heater is about 10-15 years old, it’s no longer as efficient as it could be. Upgrade to a high-efficiency water heater or a tankless unit.

BUILT-IN RUST AND CORROSION PREVENTION STILL REQUIRES MAINTENANCE

Your water heater is designed to prevent the tank from rusting and corroding through, which would end the life of your system. There is a glass lining in the tank to prevent the metal from coming into contact with water—since rust occurs when iron, water, and oxygen react.

Then, there is the anode rod. The anode rod is made of magnesium or aluminum, which is more corrosive than the steel tank. Anodes wear away as the rod corrodes, preventing the tank from corroding should the glass lining crack. But you will need to replace the anode rod every few years or so, as it eventually wears away to nearly nothing.

YOUR WATER HEATER MAY NOT LAST AS LONG AS YOU THINK

Tank water heaters only have a lifespan of about 10-15 years. After this point, your water heater may start to rust, and the risk of a leak becomes higher and higher. Proper maintenance can extend its lifespan, but we strongly recommend replacing your water heater before it experiences any major issues.


When Should You Replace Your Hot Water Heater?

Even with regular water heater maintenance, it can be tough to tell when it’s time to replace your hot water heater.

Average Lifespan

While today’s water heaters are better designed than older models, they still require regular maintenance in order to prolong their lives. With regular inspection, draining, and flushing, you can expect a gas water heater to last anywhere from 8-12 years and an electric water heater to last anywhere from 10-15 years.

Signs of Trouble

The last thing you want is your water heater breaking down on you when you need it most (especially in the winter), so take note of some signs that might mean trouble.

Rusty water

If you notice brownish or tinted water coming from your water heater, it could mean one of two things: that your water heater is rusting away on the inside or that your home’s piping is rusty. It may be tough to tell the difference, so set up an appointment with one of our water heater maintenance experts. We’ll help you determine what it is.

Rumbling/gurgling

Over time, sediment builds up in your hot water heater. As it’s heated over and over again, the sediment will get hard and will start to shift around, causing rumbling or gurgling noises. These sounds aren’t a good sign, and can lead to overworked water heaters, leaks, internal damage, and more.

Benefits Of Transmissions Repair

Finding a Reliable Transmission Repair Specialist

Are you having issues with your car’s transmission? Not scheduling the needed maintenance can cause long-term damage to your vehicle. It’s important to schedule an appointment with a professional transmission repair specialist. However, with so many shops to choose from, it can be tricky to know which one is ideal for your needs. To ensure you get the best assistance, here‘s how to pick the top transmission repair specialist in your locale.

  1. Ask Friends and Family for Reference

One of the best ways to find a trustworthy company for transmission repairs is to ask people you know for reference. Talk to family, friends, coworkers, and acquaintances. Chances are one of them recently took their car to an auto shop for transmission maintenance and can recommend the shop they used.

  1. Research Transmission Shops Online

The next step is to research transmission shops on the Web. Begin with a simple Google search. Try to find out as much as you can about the different local companies and the services they offer. If you need drivetrain repair, for instance, confirm it’s offered before scheduling an appointment.

  1. Read Testimonials

Most companies post testimonials and reviews online. Read these to get a better understanding of the transmission repair specialist in question. If you can’t find reviews, or they’re too broad and generic, ask the company directly for past customer testimonials.


Look for a Transmission Repair Shop with Certified Mechanics

For mechanics, there are often various certifications available to verify an advanced degree of specialized training. When you look for a mechanic, keep this in mind – often, a specialist will do an excellent job at a fair price because that is their prime business.

When choosing a mechanic, at least make sure that they are certified by the National Institute for Automotive Service Excellence. There is actually no legal requirement for certification to work as a mechanic, so finding someone who has taken the time and effort to prove their thorough knowledge is always a smart move, as it guarantees their professionalism.

The Automatic Transmission Rebuilders Association (ATRA) is a national board that specifically tests transmission specialists. This is a difficult certification to obtain, requiring the mechanic to pass several specialized tests related to transmission maintenance and repair. ATRA holds its certified members to a code of ethics and offers a nationwide warranty for transmission repairs, which could save you time and money with a job done right the first time.

Ask any mechanic to see his certification prior to starting any work on your car. It should be displayed on his wall, or at the very least available upon request.

Get an Estimate

It’s certainly not a bad idea to request a written estimate from any mechanic prior to agreeing to any labor. Chances are, an experienced repair shop should be able to diagnose the problem early on, and then tell you what the estimated cost for repairs will be.

By having an estimate in writing, yo also insure yourself against any surprise fees or costs when all is said and done. It is illegal for a repair shop to charge more than a pre-quoted estimate without your approval, and so having proof of a prior agreement can protect you from spending more than you thought.


Questions to Ask Your Transmission Repair Expert During Your Next Visit

We get it – no one wants to step foot in a transmission repair shop. Usually, transmission repairs are inconvenient and expensive. However, most vehicle owners must enter a transmission repair shop at least once during the lifetime of owning their automobile for transmission repairs. This can be avoided by regular transmission fluid maintenance.

The following 3 questions provide you with a starting point. Here’s what to ask a transmission repair expert during your next visit to determine if “expert” is an appropriate title:

  1. How Much Will the Repair Cost? Could You Provide an Accurate Estimate?

Depending on the nature of your repair, your trip to the transmission shop could be relatively inexpensive or extremely costly. Asking this question guarantees that you will not be caught off guard with extraneous costs – and ensures that the shop you work with offers competitive straightforward pricing.

Some shops might quote transmission repair pricing over the phone. In reality, these shops are not repairing your transmission. They are replacing your damaged transmission with a used or remanufactured unit. Any credible transmission shop that repairs transmission in-house should be able to communicate their transmission rebuild strategy in detail (see question #4); a good transmission rebuild strategy should always be tailored to the specific situation and symptoms present. Unless a transmission shop has psychic capabilities, the cost of an in-house transmission rebuild is not apparent until there is a full “tear-down” and evaluation of the disassembled transmission. Obviously, at this stage, the transmission cannot be put back together without completing a repair. It is up to the service manager to provide a best and worst-case scenario to customers prior to that “tear-down” stage. Two transmissions of the same variety can potentially have a price difference beyond $2,000. Given this fact, how can an honest transmission shop provide an accurate estimate prior to inspecting the vehicle? It would be unethical to quote the lower end of the price range only to end up with an actual price tag at the higher end of the range. This is predatory to customers and shops that engage in these types of activities should be obviously avoided!

Once the “tear-down” stage is complete, a transmission rebuilder formulates a repair strategy to get your vehicle back on the road safely and a service consultant provides an accurate estimate to the customer. In order to receive an accurate estimate, an elite transmission shop needs to collect as much information as possible from each step of the repair process, starting with the initial inspection.

  1. Do You Have Warranties for Parts or Labor?

A bad warranty is as good as no warranty at all. One key trait of an expert transmission repair company is a comprehensive warranty on all major rebuilds or repairs. The best transmission repair shops will offer upgraded options including additional years, mileage or even nationwide coverage. These options should be customizable to the needs of the vehicle owner. If a shop is not willing to stand behind their work, are you really comfortable saving a few bucks for unreliable repairs?

  1. How Experienced Are Your Technicians?

We believe that technicians are the most important part of an excellent transmission repair business. It is important to ask, “how many years of experience does each technician possess?” Do the techs work with integrity and honesty, providing high-quality service? Are the technicians certified with ASE? Knowing that the transmission shop you step foot in is built around a team of highly-qualified, highly-experienced transmission specialists is reassuring and assists with achieving quality repairs and Fast Service.


Types of transmissions

The purpose of the transmission is to transfer the power generated by the engine to the drive axle and wheels by using different gears. A car’s engine rotates within a fixed range of speeds, generally from 600 to 7,000 revolutions per minute (rpm) for most passenger vehicles.  The vehicle’s wheels typically spin from 0 to 1,800 rpm, so the transmission uses different gears with specific ratios to match the most efficient use of engine power for the vehicle’s speed.

For instance, when starting from a full stop, your car’s engine is spinning much faster than the wheels so a lower-ratio gear that supplies higher amounts of torque is needed. When traveling at highway speeds, the wheels may be turning much faster than the engine, meaning a higher-ratio, low-torque gear is needed.

There are a few varieties of transmission types found in most modern vehicles:

Automatic transmissions: The most common type of vehicle transmission for cars built and sold in the United States, automatic transmissions automatically select the correct gear for the driving conditions. Beyond special circumstances like towing a trailer or extremely steep inclines or declines, most drivers simply have to put the vehicle’s gear selector into “D” for drive and the automatic transmission does the rest. Up until recent times, automatic transmission vehicles were typically less fuel efficient than their manual transmission counterparts.

Manual transmissions: Also known as a standard transmission or manual gearbox or simply “stick,” manual transmission vehicles are a relative minority in modern American vehicles. Manual transmissions rely on the driver to select and switch gears constantly. Manual transmissions are typically equipped with a clutch pedal that’s required for the driver to be able to switch between gears. Although manual transmission vehicles provide greatly improved fuel economy (and typically cost less than automatic transmission vehicles), the downside is the constant need for attention on the part of the driver.

Continuously variable transmissions (CVT): Typically found on lighter passenger vehicles, CVT transmissions are relatively new features in terms of the American automobile market, but they offer a special set of advantages. Although they employ a different technology than traditional automatic transmissions, they perform in the same manner in terms of driver experience. Moreover, they deliver increased fuel efficiency when compared to traditional automatic transmissions.


COMMON SIGNS OF TRANSMISSION PROBLEMS

  • Transmission Fluid Color and Condition: noticeably dirty or burnt colloquial means it’s time to drain and replace the fluid. Checking the engine fluid is a pretty simple process that can be done before bringing your vehicle into a shop.
  • Low Fluid Levels: when your fluid vehicles colloquial becomes low, some basic signs can indicate you need to add fluid. You will often notice that your vehicle will shake while driving it and the engine will have a hard time shifting (even with automatic transmissions).
  • Signs of Leaks: The most common places to find leaks are the seals, transmission lines, loose pans, or faulty gaskets.
  • Overheating: Overheating can cause parts of the transmission to malfunction and will decrease the longevity of your transmission.
  • Transmission Slipping: If you step on the gas but find that you don’t accelerate or the engine revs., it’s time to bring your vehicle to a local Atlanta transmission shop.

Understanding And Preparing For A Home Inspection

The Complete DIY Home Inspection Checklist

Ready to Sell? Inspect Your Home Before You List

Whether you need more space as your family grows, you accepted a new job in a different city or you’re looking to downsize, selling your home can be an exciting — and overwhelming — time.

While there will be a lot going on as you prep your home to hit the market, don’t forget a simple do-it-yourself home inspection. Spending a little time and money before you list your home often pays off in the end. Not only will you be able to increase your asking price, but you’ll also avoid any snags if the buyer opts for a professional home inspection, which can lead to last-minute repairs before the sale closes.

DIY House Inspection Checklists for Sellers

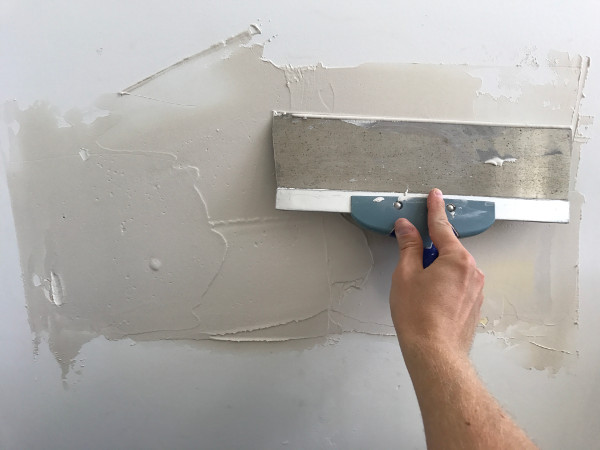
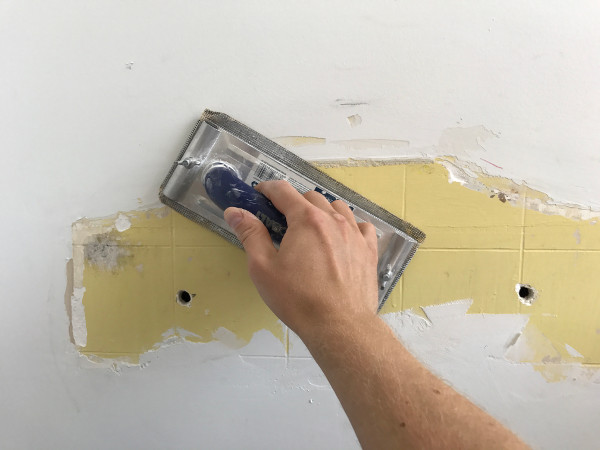
Ideally, when you go through our seller home inspection checklists, you find your home in pretty good condition. Maybe just a bit of touch-up painting or drywall patching. But that’s not always the case. Sometimes there are bigger things like a leaking pipe or a broken downspout that need attention. There are also some problems that you might not even know about. Those are the issues that a DIY home inspection will often bring to light.

We gathered the most common repairs to check for, both indoors and outdoors, as you prepare to sell your home. While our checklist will give you plenty of items to consider, it is not a replacement for a professional inspection. Rather, it is intended to give you an idea of what professionals looks for so know what to expect.

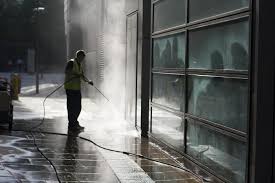
Areas to Inspect Inside Your Home Before Selling

As you work your way through the checklist, it pays off to think like an inspector. If you notice it was hard to access an area for your DIY inspection, it’s probably going to be difficult for a professional, too


What home inspectors can and cannot tell you

After all the house hunting and hand-wringing, you’ve finally made an accepted offer on a home. Now, if you’re like many buyers, you’ll hire a home inspector to cast a critical eye on the property.

But while a good inspector can give you a thorough assessment of the home’s condition, alerting you to potential safety hazards, problems big and small, and what costly repairs might be in your future, there’s a limit to what they can tell you — and even the best ones can’t see through walls.

Despite new tools such as infrared cameras and moisture meters, the process is still “a visual inspection of readily accessible areas,’’ Popp added. “We don’t necessarily speculate with any authority about what may be inside the walls.’’

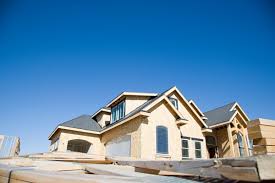
Still, a well-trained eye can detect dozens of clues about the condition of a house that buyers might otherwise overlook. “One of the most revealing things is the condition of the roof. People just don’t think about it too much; they might give it a passing glance,’’ Popp said. “If those roof shingles look like burnt bacon — you know when you overcook bacon it gets crunchy and puffy looking — occasionally you’ll see roof shingles like that, and they’re done.’’ And if there’s tar smeared in spots or on the base of the chimney, that signals a stop-gap repair that will need attention.

Popp explains all this to buyers as they circle the home together, starting outside from across the street. You should attend your inspection and participate as much as the inspector allows, he added. “I encourage people to stay right at my elbow, and I’ll explain things to them and answer their questions as I go around,’’ he said, starting with the exterior elements like the roof, gutters, wood trim, siding, window components, doors, porches, and decks. Then he brings them up close to inspect the siding and look for telltale problems like sagging gutters before heading inside to look at the living space and, crucially, the basement.


Other Mistakes Buyers Shouldn’t Make During the Home Inspection

The house-buying process can seem endless: Attending open houses. Separating your must-haves from nice-to-haves. Identifying your (sort of) dream home. Making an offer. Negotiating the final price. So when you get to inspection day, it’s tempting to heave a huge sigh of relief now that your work is basically done.

But not so fast. The home inspection is one of the most crucial steps for buying a home, and it shouldn’t be overlooked or rushed. In fact, the inspection process has the potential to be just as nerve-racking for the buyer as it is for the seller. What if you’ve fallen in love with a beautiful home that has major problems lurking beneath the surface?

Forgoing an inspection in the first place

Sure, most people know they should get an inspection on a home they’re buying from someone else

Choosing the cheapest inspection option

There are a lot of inspectors who offer very low prices for home inspections, Marlow says, and that could indicate they’re new and inexperienced, or that they’re having trouble finding clients.

Not being present for the inspection

Tempted to let the inspector just do her job and read the report later?


Increase Your Professionalism From the Moment You Arrive at a Home Inspection

Boost your home inspection referrals and client satisfaction by following these simple guidelines. Get tips on arriving to your home inspection from Kaplan’s instructor, who has been a home inspector for over 20 years. Learn how to show your customers you value their time from the moment you arrive to the time you finish.

Video Transcript

To begin an inspection, it’s absolutely critical that you arrive on time. As a matter of fact, I like to arrive about 15 minutes early. Why? I want to show the customer that I value their time. That means if they’re waiting for me, I’m going to be concerned about how they’re going to begin to feel about me. So, I’m here early. The second thing that’s really critical about a home inspection: to look professional is to bring equipment that’s clean. Don’t bring a ladder that you’ve been painting your bedroom with last night. Bring a clean ladder. Bring clean drop cloths. Bring clean booties. Keep in mind that these people haven’t bought the house yet, but they’re most likely going to. You want to show respect to their new home. You don’t want to be walking around their carpet, leaving things behind.

Make sure, again, that as you come up to the door and knock on the door, give people time to come to the door. You’d be amazed. They could be in all other parts of the house, and it’s going to take them a while to get there. What you don’t want to do is to come in and surprise somebody. Boy, that’s embarrassing. It can be, again, very, very bad for the customer relationship issue. What I like to do when I get here early is I begin to prepare my report. I begin to fill out things that are kind of general comments, the style of the home, the type of the shingles, and things like that prior to the customer getting here. The other thing that I would encourage you to do as we go throughout the house for the entire inspection is: digital photography is really in the marketplace now. It gives you a little bit of an edge, being able to explain to people what you’re looking at, what you’re seeing, and what’s good and what’s bad.

Remember that you can overuse digital photography. So, don’t make it a showmanship attitude. Make it a, “I need to show somebody something.” Communication is the number one key to the success of a home inspection. If I can both in writing and verbally explain myself well to my customers, I just won the battle, and I haven’t even started the inspection yet. The more you can prepare before the customer comes here, the less you’re going to be inconveniencing them. That’s just good business, and I encourage you to do that. I would also encourage you to, one more time, just check their name so that when you do get out and greet them, and they should be here in a few moments, you’ll be able to call them by their first name. Boy, that’s just great marketing.

The other thing that you want to pay attention to after you’ve set the ladder up on the house is to be concerned about damaging the home. If you looked up here, these are brand new gutters. I wouldn’t even consider putting my ladder up on those gutters. So, I chose to lean it against the stucco. I’ll work around some of the products that the seller has, so that I don’t damage those products. So, prepare yourself. Then, when they arrive… Oh, by the way. Here they come now.


How a home inspection works

After getting a mortgage, picking a great house, and making an offer, you might assume most of the heavy lifting in the home buying process is done. But wait—there’s one more big thing that could determine whether or not the home you’re hoping to buy is a good decision: the home inspection. No matter how invested you feel in a particular house, it’s important to get a professional opinion from a trustworthy home inspector and factor the results into your home buying decision.

What is a home inspection?

A home inspection is a report generated by a professional home inspector after they make a careful evaluation of a property. It’s intended to give home buyers an unbiased, knowledgeable accounting of any identifiable issues a home has before they make the final decision to buy it.

A home inspection typically takes place while a home is under contract—which means you’ve made an offer on a house and it’s been accepted. A buyer has a set period of time, which is laid out in their purchase agreement (it’s often a week to 10 days, but it varies) to complete the home inspection, review the results, and decide if they want to leave the contract. Under most purchase agreements, the buyer can leave the contract without a financial penalty if the home inspection reveals costly issues.

What will be covered in the inspection?

The inspector will do a visual evaluation of the house. According to the American Society of Home Inspectors (ASHI)

this review includes noting the condition of the following things:

heating system

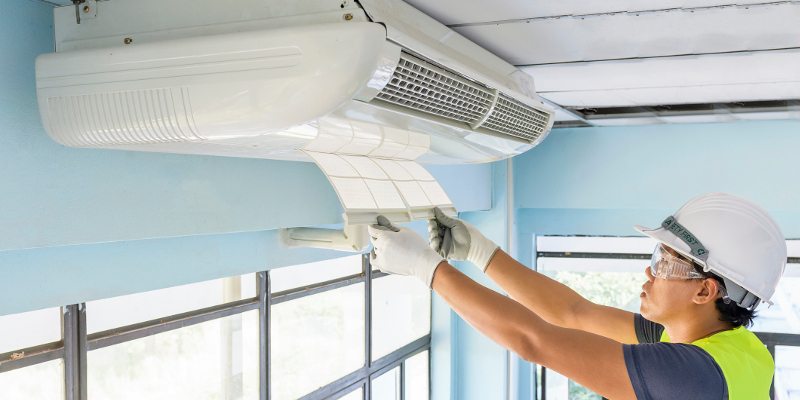
central air conditioning system (weather permitting)
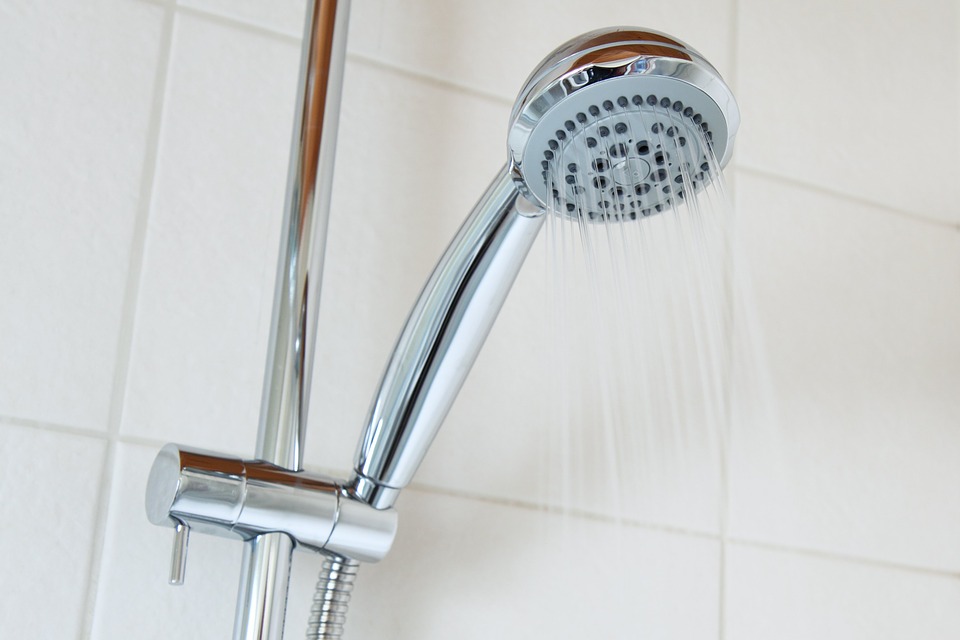
interior plumbing

interior electrical systems

roof, attic, and visible insulation

walls, ceilings, floors

windows and doors

foundation, basement, and structural components

Ways to Hire An Air Conditioning Repair Professional

Staying cool during the hot summer months is an imperative! Are you in need of air conditioning repair? Having an A/C unit malfunction during a mild autumn or spring season is perhaps most ideal, but it is not a bad idea to be prepared, just in case of a breakdown in the sweltering midst of summer.

There are lots of HVAC Contractor In Lehi, Utah which deals with air conditioning and provides all variety of services ranging from installation to repair and maintenance. But, in order to get effective services from these companies make sure you spend some of your precious time in search of trustworthy company and an honest and qualified professional.

Some Common Reasons for Air Conditioning Repair

A common problem involves a wailing noise that may start out as relatively minor but can become very loud. This usually means that there is a fan belt that has become dislodged. You could either handle this type of air conditioning repair on your own or call a technician. Either way, it is a relatively quick and simple fix. This would be a good time to also check the bearings in the fan motor to make sure they don’t need to be lubricated or replaced.

Another issue that occurs fairly frequently is that of frozen coils. When this happens, the unit will not be able to operate properly because coolant and air cannot flow freely. One of the ways of keeping this from happening is by making sure you replace your filter each month and keep your outside unit free of weeds, grass, and other debris.

If you notice any water coming from your inside system, have a professional come out to provide an air conditioning repair as soon as possible. If a leak is not fixed, water can lead to significant structural damage and lead to dangerous mold and mildew accumulation. More than likely, the cause will be a damaged condensation pan. There could, however, be other problems in your lines that are causing the leak.

If a company like this cannot fix your system, they may suggest getting a new unit. If air conditioning repair cannot be done, it is most likely because the system is really old. It may cost way too much to fix it, and it might not be worth the money. If it will cost you $1,000 to fix the system and you can purchase a new one for $4,000, you might be better off getting a whole new system. If this is the case, a good company will try to get this job done as fast as possible so that you don’t have to deal with the heat for much longer. People that are used to having air can become very uncomfortable when it is not working. Almost every home in this country has some type of cooling system, even if it is just a window unit. This is because the weather can get so hot and humid during the summer, especially in certain areas of the world. There are some parts of this country where this is not as important. If you live somewhere with really hot weather, you may understand the importance of this.

Helpful Tips to Choose a Quality Air Conditioning Installation Company

Make sure that the contractor is properly insured to perform your air conditioner installation; you’ll want to make sure that the air conditioning contractor carries a liability policy and also a workman’s compensation policy on his employees. This protects you the homeowner if something is to happen to your home or one of the contractors employees is hurt while installing you air conditioning system. I always want to see this in writing. If the contractor is not insured and something happens it can come back to your homeowners insurance or you personally.

Also, ask a few questions about the companies hiring and screening process of their employees. You’ll want to look for a company that does background checks and drug screenings on their people. I like to have an idea of what type of people will be coming out to my house. There are many contractors out there that have no hiring policies in place. It makes you think about who you would allow in your home. Don’t forget to ask the contractor for referrals of customers where they have done a similar air conditioning job. Make sure to get the phone number and call their customer. Ask the testimonial a few questions to get a feel for the contractor that will be installing your air conditioning system and what you can expect from the contractor. I would recommend going and looking at the quality of workmanship if possible.

How To Do Drywall Repairs Wall Pops

DRYWALL REPAIR & PRIMING

Homes are meant to be lived in – that’s why it’s not uncommon to see drywall with holes or some type of damage that needs repair. The good news is, it’s actually pretty easy to fix. Before we pick up a paintbrush, we’ll repair any drywall damage first. We’ll patch, sand, and prime your drywall to create a perfect surface. It’ll be like you’re living in a brand new home!

DRYWALL REPAIR SERVICES

Drywall damage can happen pretty easily. If you’ve used a nail to hang up a picture, or had a doorknob put a dent into a wall, you know just how delicate this surface can be. While it might not seem like a big deal, even the smallest hole can be noticeable. If these holes and damaged parts aren’t properly covered up before a paint job, they’ll be even more noticeable. We’ll be happy to help you fix these problems. It’s one of the many ways we’ll WOW you!

Drywall damage doesn’t just come from overly rambunctious kids or clumsy adults. Damage often occurs naturally, and in much more subtle ways than you might think

Here are some of the most common causes of drywall damage:

Small punch-through holes from nails,

Popping nails,

Furniture scuffs,

Loosened up joint tape,

Damage from tile removal,

Cracks from settling,

Damage from moisture or mold,

Everyday wear and tear,

Damage from kids,

Damage from rodents, and

Holes from drywall anchors.

PRIMING DRYWALL FOR PAINT

Before we paint, we’ll do a walkthrough of the space and inspect for any existing damage. We’ll take note of all the spots that need repair, and then we’ll get to work! Very small holes (like those from nails) can be fixed by simply filling them with mud/spackle, and sanded down once dried. This is usually a pretty quick process.

For bigger holes (like those from door handles, etc) will need to be patched, which is a bit of a more complex process. First we’ll carefully measure the hole, and cut a patch of drywall to fit it. We’ll then apply mud/spackle around the edges of the hole on the wall. Next, the patch is carefully applied, with more mud being applied over top of the patch. Once it has dried, we’ll sand it down to create a smooth surface that’s ready to be painted.


THE ONE-HOUR DRYWALL MUD PATCH

Not every drywall surface repair will require new sheetrock installation. In a lot of cases, a simple coat of drywall mud is enough to hide gouges, blemishes and unfinished areas. This short article will show you how to make simple mud patch repairs to your walls—and carry out the whole process in one hour or less!

When most homeowners set out tackle drywall repairs, they usually purchase large, pre-mixed batches of joint compound. While these bucket-sized portions can be helpful for mudding an entire room, they tend to be overkill for patching small areas

A far more effective solution is using 20-minute joint compound. This fast-setting powder is perfect for carrying out numerous small projects over time. (It can also be found for less than $10 a bag at Lowes or Home Depot.)

Typically just a few cups are required for a small repair. The rest of the compound can be stored in a heavy garbage bag, tied off at the top to prevent the powder from taking on moisture.

You’ll want to begin the repair by lightly sanding the area where you’re going to apply your mud patch. (In this case, a wall-mount sink was removed to make room for a new pedestal unit that wouldn’t hide the old scarring.)


Most Common Causes of Damage to Drywall

Have you been noticing scuffs and holes on the drywall in your house? Wondering how they got there? There are a number of ways drywall can get damaged, some of which you should know about before moving that extra large couch upstairs

Popping Nails

Occasionally, if nails are not securely set in the centre of the joist or stud, over time a nail may pop through the drywall. Don’t reach for the hammer and try to nail it back, as you can do further damage and the nail could eventually come out again. Simply remove the nail and find where the stud is, then nail it through in a slightly different point so you know it’s properly and securely fastened.

Furniture Scuffs

Scuff marks from furniture are another form of damage you may find, even before you move into your home. They’re typically more minor, and have the appearance of a pencil or marker stain. Avoid scuffs by carefully moving items around in your house and not placing bigger furniture too close to the wall. If the damage hasn’t actually ripped off pieces of drywall, the problem can be solved with an easy-to-find cleaning sponge.

Smaller Holes

Small holes can be caused by a number of things, like a door that swings open too hard. You can avoid this from happening again by buying an adhesive backing plate for the wall. Just line it up with the door knob or corner of the door and you’ll protect the drywall from future damage

Bigger Holes

Did a wrecking ball crash through your wall while filming a music video or did you accidentally trip, resulting in a large hole in your drywall? However that hole got there, you can avoid it happening again by just being more careful.


How to Repair Drywall the Right Way

Whether you’re renting or owning, we’ve all had a gallery wall or a shelf installation go wrong. One mis-measured anchor and now there’s a golf-ball sized hole in the drywall. A stud-finder could have saved the day, but we’re here now. Good thing it only take three steps to repair your drywall. It’s so easy you can make a drywall day out of it!

Step 1:

Cut your mesh to fit. Layer the mesh on top of the hole to see how much extra to remove. There should be about an inch around the hole. Apply a bit of spackle to the back of the mesh patch and adhere to the wall, pressing it on. Let dry.

Step 2:

Generously apply spackle to the patch and about a three inch circumference around it. Let dry.

Step 3:

Sand the spackle lightly until smooth. Blend the edges into the wall, careful not to sand down to the patch. Repeat step 2, as needed. Paint over the area with matching paint.

Repeat as many times as you need to refresh your space and get back that security deposit. Next time, a stud-finder can help you anchor your heaviest pieces without sacrificing precious drywall.


Experts in Drywall Repair, Preparation and Painting

Does this sound like you? You’ve been itching to paint a room in your house. You glance with longing at the paint swatches in your local hardware store. You even visualize new wall hangings and furniture organization…but you still haven’t booked your local painters. Something is standing in the way.

Always Repair Your Drywall Before Painting

Painting over damaged drywall is like putting a Band-aid on an open wound. It doesn’t fix the problem. In fact, it doesn’t even hide it well. With drywall damage, you need to start at the source. You’ll be glad you did!

When your drywall is repaired properly, you can rest assured knowing that there are no underlying issues with your walls or ceiling. Plus, your paint will adhere like it’s supposed to. Take a look at the leading causes of damage, and see which one applies to you

The Top 3 Causes Drywall Damage

Water damage. We’ve all seen the ugly brown stains that come from water damage. If you’re not sure where the leak is coming from, that’s a good place to start. Once the repairs have been made, the drywall needs to be removed, replaced, and painted.

Loose drywall tape. When the tape between drywall sections comes loose, it tends to crack and peel in long strips. This can happen from an excess of humidity or from improper installation. Either way, it damages the paint, and the area needs to be replaced, patched, and painted.

Wear and tear. Whether it’s from furniture scuffs, swinging doors or an unfortunately placed elbow, drywall takes its share of dents and bruises. When the surface of the drywall is cracked or broken through entirely, some real repairs are in order.

The Essentials of Repairing Drywall

Unless you’re a bona-fide handyman, drywall repair is no easy DIY task. We recommend seeking out your local professionals. You’ll want a team that will

Outdoor Ceiling Fans Installation

Ceiling Fans – Don’t Underestimate Their Impact

As the mercury rises this summer, most people are going to be looking for ways to keep their electricity bills down. But before you make any changes around the home, here are a few air conditioning myths to watch out for.

Fans Keep a Room Cool

Fans don’t make a room any cooler, they merely make you feel cooler. By moving air over your skin, a fan can lower your body temperature, but will do nothing for the heat inside a room. So if you’re not in the room, you’re just wasting energy by leaving the fan on. However, there’s one exception to this rule: if the air temperature outside the house is cooler than the air inside, then placing a fan near a window can help draw cool air into the home or create a cross current to exhaust some of the hot air trapped inside.

Upgrading to a bigger air conditioner will give you better results

As summer stretches into the hottest months of the year, your air conditioner might be straining to keep your home cool, causing you to head to the store for a newer and bigger unit. But there are a lot of reasons your air conditioner might not be up to the task. As with any appliance, an air conditioner needs regular maintenance. Start by cleaning the air conditioner, and if that doesn’t help, you can try to get it serviced. If the air conditioner is installed in a spot that gets direct sun all day long, moving it to a shadier location might help. Also the problem might not be the air conditioner at all. If you have a lot of leaks in your house, such as cracks around the windows, missing weather stripping around the door, or poor insulation, the problem could be your house. Try to look for any gaps where you might be leaking cold air and plug them up.


An air conditioner is just a device to cool the air

Sure, air conditioners produce a steady stream of cool air, but there’s actually another factor at play when it comes to making you comfortable in the summer. In addition to cooling the air, air conditioners also reduce humidity. Humid air feels hotter than dryer air. Many air conditioners have a drying function that is dedicated to reducing humidity, and this setting also uses a less energy. If your air conditioner doesn’t have this setting, you could also try using a dehumidifier to save a little money on your energy bill.

Crank the temperature down for faster cooling

Central air conditioners are designed to work at a fairly constant pace and then turn off when your home reaches the desired temperature. So turning the temperature way down won’t cool it faster, it just means you might end up with a frigid house if you forget to readjust the thermostat once you hit a comfortable temperature, wasting money and energy. There is, however, an exception to this rule. If you have a window unit, you likely have low, medium and high settings. Using the high setting will cool things off faster — just remember to turn it down once your home feels comfortable.

It’s more efficient to leave it on all day than to raise and lower the temperature

Programmable thermostats are a great way to save money on energy bills during both the winter and summer months. By setting your thermostat to change the temperature in the house when you’re not around, you can dramatically cut down on energy usage. Many people believe that an air conditioner has to work extra hard to cool the house back down when you get home, negating any benefit from turning the temperature down. However, this simply isn’t true. Even when you’re not around, your air conditioner is hard at work keeping the place cool, which leads you to waste a lot of energy. So feel free to use the program function on your thermostat and save some money on your bills this summer.


Energy offers hot summer savings tips

  • The number one way to conserve energy is to set the thermostat to the highest comfortable temperature. Dominion Energy and the U.S. Department of Energy recommend 78 degrees for maximum efficiency. A savings of up to 3% on cooling costs can be achieved for each degree the thermostat is set back.
  • Use programmable thermostats to save money by automatically turning up the AC while when not at home.
  • Sunlight shining through windows can account for up to 40% of unwanted heat gain and can force the air conditioner to work two to three times harder. Closing the blinds during the day offers one solution. Installing curtains that can close during the heat of the day also can make a difference.
  • Turning off lights and the TV or unplugging unnecessary appliances are simple solutions that can yield immediate energy savings.
  • Turn off and unplug everything possible when on vacation.
  • Don’t underestimate the importance of ceiling fans. Moving air over the body provides a cooling effect. Most fans have a switch to change the fan direction. Make sure ceiling fans are blowing downward (in a counter-clockwise direction) to send air past your body. Turn fans off when the room is unoccupied.
  • Replace or clean forced air heating/cooling system filters monthly.
  • Keep the water heater set at 120 degrees and insulate the heater and adjacent pipes to prevent heat loss.


Energy Saving Tips for Every Season

Winter

  • Seal air leaks. Seal all holes from pipes and wires that enter/exit the living space, including entrances, pull-downs and attic stair openings, light fixtures, pipes and wires.
  • Seal duct work. Make sure that all duct work is sealed at joints and intersections with duct sealer or silicone caulk. Otherwise, supply duct work can leak heated air into the attic or crawl space, and outside air can be drawn into the return duct work, increasing costs and reducing comfort dramatically. Ducts can be sealed using foil-backed tape or silicon caulking.
  • Lower water heater to 120-125 degrees. Many water heaters are automatically set at 140 degrees. Lowering the temperature on your water heater to between 120 and 125 degrees will reduce the amount of fuel needed to heat the water.
  • Change furnace filters every month. This is the number one reason for furnace breakdowns. Inspect heating and cooling equipment annually, or as recommended by the manufacturer. Have a professional check and clean furnaces once a year.
  • Weatherstrip doors, windows and attic entryways. Inspect windows and doors for air leaks. If you can see daylight around a door or window frame, then the door or window needs sealing. Air leaks can be sealed with caulking or weather-stripping. Insulate attic entryways.

Summer

  • Raise your thermostat to 78º. If you will be away from home for more than eight hours, raise the thermostat setting a bit more and you can save for each degree of setback, reducing the amount of energy used to cool your home while you’re away. Learn more about your thermostat online by visiting the U.S. Department of Energy website.
  • Keep shades closed when the air conditioner is on. Sunny windows add heat to your home and can make your air conditioner work two to three times harder.
  • Check and clean filters. Cleaning and replacing air conditioning filters monthly allows the system to run more efficiently.
  • Clear attic vents. If the home has an attic fan, make sure it is functioning properly.
  • Install ceiling fans and make sure they are blowing down. Don’t underestimate the importance of ceiling fans. Moving air over the body provides a cooling effect. Most fans have a switch to change the fan direction. Make sure ceiling fans are blowing downward (in a counter-clockwise direction) to send air past your body.
  • Wash dishes and clothes in the early morning or late evening. By doing these chores during cooler times of the day, you will reduce the heat and humidity in the home. These appliances also produce additional heat, causing your air conditioner to work harder.


Experts suggest the following tips to keep your air conditioner running smoothly.

  • Change your air filters regularly.
  • Be sure to avoid blocking floor, wall or ceiling vents.
  • Make sure your outside condensing unit isn’t covered or clogged with leaves or debris.
  • Check to make sure the drainage system isn’t clogged.
  • Don’t run your system in cooling mode when outdoor temperatures are lower than 55°.
  • Consider sealing or insulating your ducts.
  • Make sure the vegetation is kept away from the outdoor unit.
  • Make sure your outdoor unit is clean.

Discover Kitchen Remodeling Ideas That Add To Your Home

Kitchen Remodel Ideas that Have the Highest Impact on Resale Value

If you’ve been looking for design inspiration to remodel the kitchen on Pinterest, that’s great! You deserve to have a kitchen remodel that you can be proud of. But amidst all that, don’t forget to take things beyond the aesthetic. A functional kitchen is way more important than just a beautiful kitchen. Why not take your search up a notch up by narrowing down on the kitchen remodel ideas that are actually worth it?

And we don’t mean just aesthetically or in terms of the added convenience they offer — we also mean in terms of money. The idea is to create a kitchen you like working in, in a budget that you can afford, while also ensuring that you gain a return on your investments. It’s the details that count when it comes to remodeling. Just like everything else, not every investment has equal returns; so elements need to be picked carefully. The right changes in your remodel can boost up your ROI while the wrong ones will cause a staggering fall.

Compromising on quality by opting for cheaper options for a kitchen remodel will not do you any favors either. The items won’t last long, and it will only have a severe effect on your ROI. Besides, can you imagine the hassle of replacing those items in just a few months?

Painting Your Kitchen Walls During Your Remodel

Sometimes it’s best to take a step back from the nitty-gritty and look at the bigger picture. Your kitchen is an essential place in your home, as many family moments are created and cherished in the kitchen.

And for it to be that place, a lot goes into it too. There’s kitchen cabinets, countertop, appliances, and so on. But for these elements to stand out, your kitchen needs the right color scheme. Based on the wall paint, you can then choose the right color for kitchen cabinets and countertop too. In a way, your walls play an even more significant role in setting the kitchen design scheme that other things simply follow.


Things To Consider When Planning A Kitchen Remodel

We all know that life happens and change is inevitable. Even if you were completely in love with your kitchen when you first moved into your home, you may find it no longer suits your needs or style. In most cases, remodeling your kitchen is much more practical and cost-efficient than moving houses. But, at the same time, planning a kitchen remodel is no easy feat. Planning is paramount to ensure you get what you want and need without wasting time or money along the way

Life Stage

The stage of life that you and your family currently find yourselves in will have a big impact on the way you design your kitchen. The amount of traffic you expect your kitchen to see will affect not only the layout but the materials you choose as well. For example, if you’ve had kids since your previous , you may need to make it more child-friendly this time around. If you have a busy, active family, a design with good flow and an easy-to-navigate layout could be extremely beneficial for you. You may even want to consider materials that stand up to heavy use and are easy to clean. Whatever your needs are, incorporate them into your new design to help make your kitchen as efficient and easy to use as possible.

Timeline

There is no question that remodeling your kitchen will take time and cause upheaval in your family’s daily routine. This is something that is extremely helpful and important to plan for ahead of time. How will you shift and accommodate not having regular access to your kitchen? Will you eat out more? Do you have the space to organize a temporary, make-shift kitchen in another part of your home? If the weather is nice, maybe you will do a lot of outdoor grilling. Talk to your project manager about deadlines so that you will have an idea of how long you can expect to be without a kitchen. Being able to see a light at the end of the tunnel and knowing that your dream kitchen is waiting for you can often make the inconvenience a lot easier to endure.

Budget

Before you start your kitchen , it’s important to set a budget. Figure out what you can safely and comfortably afford and plan accordingly. Then, talk to your project manager and see which projects are the best to tackle first. If you know that you only have enough money set aside for a few projects, take some time to prioritize which ones are most important to you. At the end of the day, you may not be able to remodel your entire kitchen, but at least the elements that are most beneficial to you will be out of the way.

Functional Layout

The kitchen is the heart of the home. It can host many different activities such as food prep, , entertaining, and family time. Because of this, the layout of your kitchen is one of the most essential elements to consider when planning a remodel. You want your space to be functional. So, before you start, it’s important to know and understand what kind of space you have to work with.


Kitchens That’ll Make You Want to Redo Yours

The kitchen is probably the most used room in your house, so you want it to be a space you enjoy spending time in. And aside from functioning appliances, a kitchen design you’ll love for years to come is of utmost importance. So whether you’re renovating or simply looking for some inspiration, we found 90 kitchen design ideas that will help you optimize your own—and the best lessons to take from them. From country casual to sleek and modern—and literally everything in between–we’ve got all the kitchen remodel inspiration you could ever need. Gorgeous countertops, unique backsplashes, and statement lighting, we’re coming for you

Tile Your Hood

Cover your hood in the same material as your backsplash to make it look sleek and clean. Here, interior designer Heidi Caillier camouflaged a bulky appliance with zellige tiles.

Strike a Balance

This kitchen by Romanek Design Studio proves that balance is everything. The dark, moody tile walls, sleek backsplash, and stainless steel appliances assert an undeniably glam aesthetic while the wood and brass tones ground the space and give it that classic classic warmth. The bohemian runner also adds just enough color and fun.

Mirror Your Surfaces

If you love shiny stainless steel and edgy mirrored surfaces, take the metallic look to the next level with a gold mirrored island. In this kitchen designed by Dries Otten, the island brings some glamour to the playful elements throughout, like the single pendant light, swirls of pink marble, and cobalt blue loft railing above.

Choose an Adventurous Wallpaper

This swirly wallpaper proves that making adventurous design decisions can pay off. In this kitchen designed by Rita Konig, the wallpaper in question is Antoinette Poisson’s Jaipur. We love it even more paired with the rich purple-veined marble and painted cabinets. To protect it from water damage, Konig added an invisible glass over the wallpaper between the counter and cabinets.


What things do you need for kitchen renovation?

Design style and cabinetry

Explore kitchen designs that suit your personality, your lifestyle and the style of your home. There are no right or wrong conventions, but the style of kitchen you choose should blend perfectly with the rest of your interiors.

If you’re the proud owner of a period property you may be considering a traditional kitchen style. In a contemporary property you’ll have a mandate for much more minimalist and streamlined modern designs. That’s not to say modern kitchens can’t be embraced in older homes, so long as it blends with the rest of the home and is tastefully done

Flooring

The type of flooring you choose, along with its colour, can have a huge impact on the look of your kitchen. Limestone or marble tile floors are elegant bases for large traditional kitchen spaces

Worktops

As with flooring, worktops can make or break the overall look of the kitchen. Countertops are the workhorse of your kitchen, so durability should be factored into your choice. You’ll need to think about practicality of material for everyday use, the overall style and the color

Sinks and taps

There are plenty of style options and sizes when it comes to choosing a humble kitchen sink. There are also a wide variety of tap types to match. The kitchen sink is probably one of the most hardworking pieces of equipment in your kitchen, so it’s an important design aspect to get right.


THINGS TO CONSIDER BEFORE A KITCHEN REMODEL

Is a kitchen remodel on the horizon? If you’ve been catching yourself dreaming of an update the heart of your home (which may or may not be screaming late 90s/early 2000s), we’ve put together a list of things to consider before a kitchen remodel goes into play

We gathered our team to discuss common factors that we encourage our clients to consider before taking the renovation plunge. Not that we don’t think it’s a great idea (we’re in that business after all), but just that things will go a whole lot smoother once you have a clear direction in place.

BUDGET

This is by far the MOST important thing to consider. There are many factors that come to play here but at the end of the day your budget needs to be your budget. There are also underlying costs that are unforeseen that we won’t know about until we open up walls and demolition takes place, so we suggest to our clients to have a 10-12% contingency fund of the total cost of the project put aside for the ‘what ifs’. It’s best to be prepared and if you don’t need it – all the better!

LAYOUT

Speaking of budget, do you want to keep the existing layout? Or add/remove walls? That will significantly affect the cost (relocating plumbing, electrical and such can vastly change the budget). If the walls are load bearing, permits may be required depending on the structural work being done (which can make another hit to your budget). Something important to consider for condo owners–are strata approvals necessary?

DESIGN

If you’ve been dreaming of a kitchen remodel for a while, it’s probably safe to say that you have a specific look/style in mind. With the powers of Pinterest and Instagram, we have access to amazing inspiration. Interior design is best left to a professional, which is why we have an in-house designer at Novero. To ensure you get exactly what you wanted (and more), our Design Team works closely with our clients to decide on everything from plumbing fixtures and paint colours to cabinetry profiles, etc. We also start by asking our clients, how they want their kitchen to function, because functionality is important and often missed without the help of a professional designer to help you see the bigger picture.

Finding the Right Moving Company

There comes a time when changes in your life will have to make you relocate to bigger and better things. Sometimes people get a promotion at their job or find a better job with better pay. The only bad part about that is that the job requires you to move to a newer location. But with the new move you may improve your personal financial status and in the long run it may provide you with a better future. Now, the tough part. Where are you going to find movers near me and can they help you real soon?

Don’t stress out too much on this part. The last thing you need to do is add more confusion to your already stressful time of your life. As long as you take the time to plan out your move you will be able to get this done in no time at all. First, you are going to have to see which residential moving company is going to serve you the best. Your move may be considered a long distance or short distance move. These moving companies will help you determine the cost for you move so you can plan it better. Since there are so many different moving companies out there, you may want to take a good amount of time determining which one will be the best suited for your moving needs.

To make your move easy, remember to:

· Keep the Bill of lading that is given to you by the moving company as it is a legally binding note of contract between you and them.

· Read the quote which is on your contract as well as the agreed upon rates. Also be sure to read the moving company’s liability of your goods, delivery date and insurance claim clauses.

· If you are packing your goods, pack them properly to eliminate damage and breakages. With better moving boxes and wooden crates easily available, it is best to pack delicate glassware and other items in Styrofoam.

There are full services moving companies that offer wide range of moving plans and related moving services like packing and unpacking the some particular things, piano packing and reassembling and pet moving etc. They handle all relocation services from reserving the moving vehicles to packing your property to helping you with real estate related services in the city or the state people are moving to.

Most of reputed moving companies are the members of the American Moving and Storage Association (AMSA) and kind of local moves are supervised by the Federal Department of Transportation (DOT). For these reason moving companies are provoked to be accountable for the damages and liabilities. The moving companies are attentive of the laws which they have to comply with.

Through the way of proper planning and the research moving can ease away the moving hazards, as the moving is made to a new destination based on some specific dreams.

How To Effectively Roll A Bat To Achieve Optimal Distance Results

How to Get Rid of Bats

If bats have taken up residence in your home, you may have a bigger problem on your hands than noise. Invading bats often cause structural damage and leave behind droppings that slowly corrode wood and other building materials. Exposure to bat guano can also pose a serious health risk to you and your family if ignored. Bats are protected species in many parts of the world, so your first step is to find out what you can legally do in your country

Verify that it’s bats you’re dealing with. The occasional rustling in the attic may just be an old water pipe or the sound of the house settling. Make sure you’ve excluded all other possibilities before you begin spending time and energy on a bat-removal project. The best way to tell that you have bats in your home is to see one with your own eyes or come across their tell-tale droppings

Be on the lookout for droppings. Bat excrement (commonly known as “guano”) most often takes the form of small, dark pellets. These are round in shape and give off an overpowering musky stench. Should you encounter bat guano in any part of your home, there’s a good chance that bats have recently been roosting there

Research the types of bats found in your area. There are many different varieties of bats. Find out when maternity season begins for your local bat population. If you drive off the mother after she’s given birth, her babies won’t be able to survive. This will leave you with an unbearable stench and an attic full of dead bats to dispose of

Inspect for places where bats might be getting in. Bats gravitate toward dark, enclosed spaces because they most closely resemble their natural cave habitats. Take a look around your attic, chimney flue, basement or crawlspace and see if you can turn up evidence that bats have been roosting there. Pay special attention to areas accessible through small cracks and apertures, as bats often use these as entry points


How to Get Rid of Bats

Forget mothballs, aerosols, and ultrasonic deterrents. They don’t work, particularly if you have an established colony of bats in your house. The easiest way to get rid of bats is through a process called exclusion.

Bats love old houses: All those crumbling chimneys, cracks and holes, and vents with missing screens are open doors for little mammals that can squeeze through a 3/8″ x 1″ crack, or into a hole smaller than a quarter.  A few bats during migration season may be a temporary situation and nothing to worry about. If there’s bat poop—guano—all over the place, you’ve got a problem

Bats are a critical part of the ecosystem, controlling the insect population. It’s impractical, inhumane, and probably illegal to kill them, so you have to go through a live exclusion. If the infestation is large or has been recurrent over years, call in a pro for both exclusion and cleanup. Every state has a wildlife or conservation department that can help you find a licensed wildlife removal specialist

Inspection

Where are the bats getting in? Do a sunny-day inspection to look for missing roof shingles, deteriorating eaves, holes in soffits, etc. Then watch the house (all sides) on a warm, clear summer evening, beginning just before dusk, noting any bat activity. Also, entry points may have “bat tracks,” or greasy brown marks, around them.

Exclusion

The process of exclusion involves using netting or tubes at entry points, which allow the bats to drop down and take flight but which confound re-entry. The excluders are left in place for a week, so that the bats give up. After they’re gone, the plugging and sealing and caulking can take place.


How to Get Rid of Bats

Bloodsuckers! Vampires! Dracula!

Those are some of the first thoughts people naturally tend to have when the subject of bats comes up. It’s understandable but entirely unnecessary. As it turns out, bats are some of the most harmless, inoffensive creatures on earth. Your cat or dog is more likely to bite you than a bat.

Bats aren’t related to rodents either, as many people suppose. The old trope of ‘flying rats’ is unwarranted. Nor are they blind during the day. They’re nocturnal, of course, but their eyes are perfectly normal and they can see just fine in daylight.

What Attracts Bats in the First Place?

The first step in getting rid of bats is to know what they’re attracted to and what kind of environment they prefer. Once you know that, you’ll know where to look for them and how to get rid of them if you have a bat problem.

Cave Dwellers

Bats in the wild are cave dwellers, hiding from the sun during the day. The rough surfaces of rocks give their clawed feet good purchase to cling to when they sleep upside-down during the day. A colony of bats in a cave are mostly females, taking care of their baby bats, called pups.

Food Sources

When the sun sets, bats quit roosting and fly out of their living space to go hunting. Incidentally, bats are the only mammals that can fly. So-called flying squirrels can’t fly.  They jump then glide on the outstretched membrane between their legs but they don’t actually fly.


Getting Rid of Bats From Your Home, Property

If you have a bat colony living in your home or find a lone bat in your yard, here’s what you need to know about these creatures before you evict them yourself, or call a wildlife removal professional that has exclusion devices.

Problems Caused by Bats

Bozone says bats can pose some serious health risks to people if you get a bat infestation in your home, sheds and other areas of your property.

If you compromise the droppings without precautions, you can cause histoplasmosis. It is an infection caused by breathing in spores of the fungus often found in bird and bat droppings. Professional bat poop cleaners use respirators.

Getting Rid of a Single Bat Inside Your Home

Turn on lights in the house to see the bat. They can see you. The myth was wrong. Bats can see and are not afraid of the light. Close doors to adjoining rooms and open exterior doors and windows in the room to allow the pest to fly out.

Don’t Touch a Bat

Handling the bat with bare hands is definitely a no-no. It could bite you to protect itself, just like any animal. If it does bite someone or transfer saliva to someone’s open wound, eyes, mouth or nose, go to the emergency room quickly. Save the bat, too, to be tested for rabies.


How To: Get Rid of Bats

The good news: Bats are not aggressive. The bad news: If there are bats in your house, it’s only a matter of time before their waste begins to pose a serious problem.

Health concerns aside—and there are indeed viable health concerns—bat droppings and urine can actually destroy wood and other building materials, gradually compromising the structural integrity of your home.

So even if you are not skittish and don’t mind the idea of bats dwelling under your roof, there are very good, rational reasons to act fast. Follow the steps outlined below about how to get rid of bats and prevent them from returning.

Research local laws

Familiarize yourself with local laws. In most states, bats are a protected species, which means that it’s illegal to kill them. One humane approach is to install a bat house on your property prior to evicting your unwanted guests. Chances are that once barred entry to your home, the bats would take up residence in the new accommodations you’ve prepared. From there, you could count on the bats to continue their beneficial service of eating the insects on your property.

Identify the bat type

When you’re trying to get rid of bats, it’s essential to figure out what type of bat you’re dealing with. So the first thing to do is learn what types of bats are common in your neck of the woods. Next, try to get a good look at the bats, if you haven’t already, so you can compare your observations to your research. Vampire aficionados could easily guess that your best chances of seeing a bat are at dusk and dawn.