DRYWALL REPAIR & PRIMING
Homes are meant to be lived in – that’s why it’s not uncommon to see drywall with holes or some type of damage that needs repair. The good news is, it’s actually pretty easy to fix. Before we pick up a paintbrush, we’ll repair any drywall damage first. We’ll patch, sand, and prime your drywall to create a perfect surface. It’ll be like you’re living in a brand new home!
DRYWALL REPAIR SERVICES
Drywall damage can happen pretty easily. If you’ve used a nail to hang up a picture, or had a doorknob put a dent into a wall, you know just how delicate this surface can be. While it might not seem like a big deal, even the smallest hole can be noticeable. If these holes and damaged parts aren’t properly covered up before a paint job, they’ll be even more noticeable. We’ll be happy to help you fix these problems. It’s one of the many ways we’ll WOW you!
Drywall damage doesn’t just come from overly rambunctious kids or clumsy adults. Damage often occurs naturally, and in much more subtle ways than you might think
Here are some of the most common causes of drywall damage:
Small punch-through holes from nails,
Popping nails,
Furniture scuffs,
Loosened up joint tape,
Damage from tile removal,
Cracks from settling,
Damage from moisture or mold,
Everyday wear and tear,
Damage from kids,
Damage from rodents, and
Holes from drywall anchors.
PRIMING DRYWALL FOR PAINT
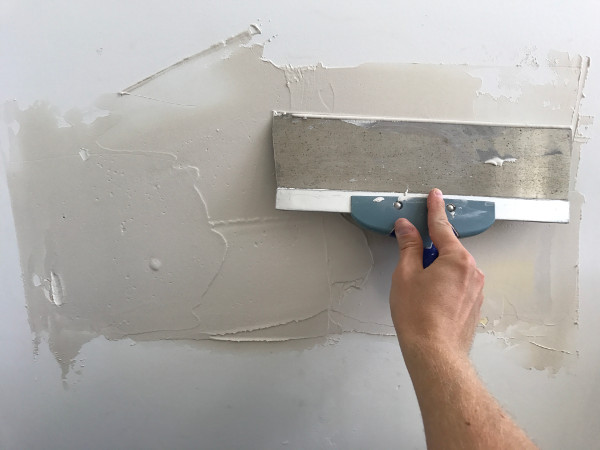
Before we paint, we’ll do a walkthrough of the space and inspect for any existing damage. We’ll take note of all the spots that need repair, and then we’ll get to work! Very small holes (like those from nails) can be fixed by simply filling them with mud/spackle, and sanded down once dried. This is usually a pretty quick process.
For bigger holes (like those from door handles, etc) will need to be patched, which is a bit of a more complex process. First we’ll carefully measure the hole, and cut a patch of drywall to fit it. We’ll then apply mud/spackle around the edges of the hole on the wall. Next, the patch is carefully applied, with more mud being applied over top of the patch. Once it has dried, we’ll sand it down to create a smooth surface that’s ready to be painted.
THE ONE-HOUR DRYWALL MUD PATCH
Not every drywall surface repair will require new sheetrock installation. In a lot of cases, a simple coat of drywall mud is enough to hide gouges, blemishes and unfinished areas. This short article will show you how to make simple mud patch repairs to your walls—and carry out the whole process in one hour or less!
When most homeowners set out tackle drywall repairs, they usually purchase large, pre-mixed batches of joint compound. While these bucket-sized portions can be helpful for mudding an entire room, they tend to be overkill for patching small areas
A far more effective solution is using 20-minute joint compound. This fast-setting powder is perfect for carrying out numerous small projects over time. (It can also be found for less than $10 a bag at Lowes or Home Depot.)
Typically just a few cups are required for a small repair. The rest of the compound can be stored in a heavy garbage bag, tied off at the top to prevent the powder from taking on moisture.
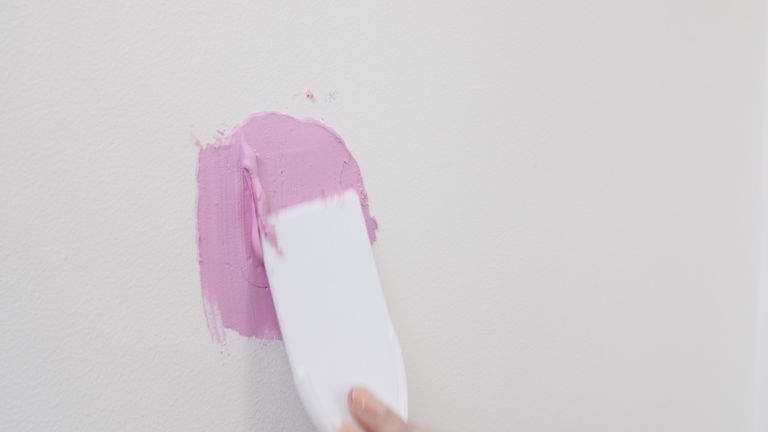
You’ll want to begin the repair by lightly sanding the area where you’re going to apply your mud patch. (In this case, a wall-mount sink was removed to make room for a new pedestal unit that wouldn’t hide the old scarring.)
Most Common Causes of Damage to Drywall
Have you been noticing scuffs and holes on the drywall in your house? Wondering how they got there? There are a number of ways drywall can get damaged, some of which you should know about before moving that extra large couch upstairs
Popping Nails
Occasionally, if nails are not securely set in the centre of the joist or stud, over time a nail may pop through the drywall. Don’t reach for the hammer and try to nail it back, as you can do further damage and the nail could eventually come out again. Simply remove the nail and find where the stud is, then nail it through in a slightly different point so you know it’s properly and securely fastened.
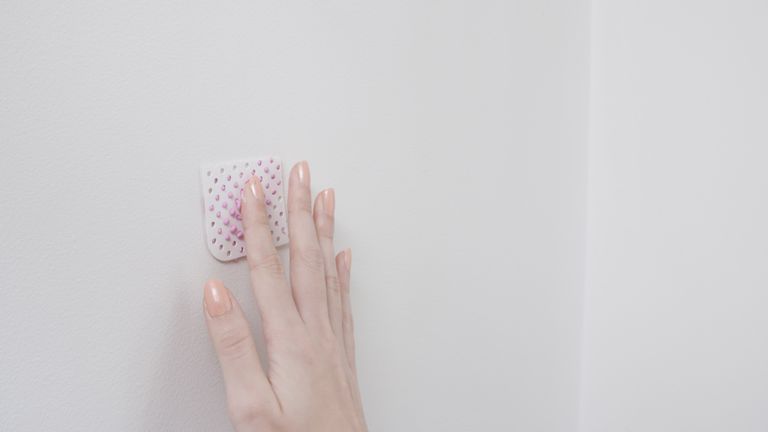
Furniture Scuffs
Scuff marks from furniture are another form of damage you may find, even before you move into your home. They’re typically more minor, and have the appearance of a pencil or marker stain. Avoid scuffs by carefully moving items around in your house and not placing bigger furniture too close to the wall. If the damage hasn’t actually ripped off pieces of drywall, the problem can be solved with an easy-to-find cleaning sponge.
Smaller Holes
Small holes can be caused by a number of things, like a door that swings open too hard. You can avoid this from happening again by buying an adhesive backing plate for the wall. Just line it up with the door knob or corner of the door and you’ll protect the drywall from future damage
Bigger Holes
Did a wrecking ball crash through your wall while filming a music video or did you accidentally trip, resulting in a large hole in your drywall? However that hole got there, you can avoid it happening again by just being more careful.
How to Repair Drywall the Right Way
Whether you’re renting or owning, we’ve all had a gallery wall or a shelf installation go wrong. One mis-measured anchor and now there’s a golf-ball sized hole in the drywall. A stud-finder could have saved the day, but we’re here now. Good thing it only take three steps to repair your drywall. It’s so easy you can make a drywall day out of it!
Step 1:
Cut your mesh to fit. Layer the mesh on top of the hole to see how much extra to remove. There should be about an inch around the hole. Apply a bit of spackle to the back of the mesh patch and adhere to the wall, pressing it on. Let dry.
Step 2:
Generously apply spackle to the patch and about a three inch circumference around it. Let dry.
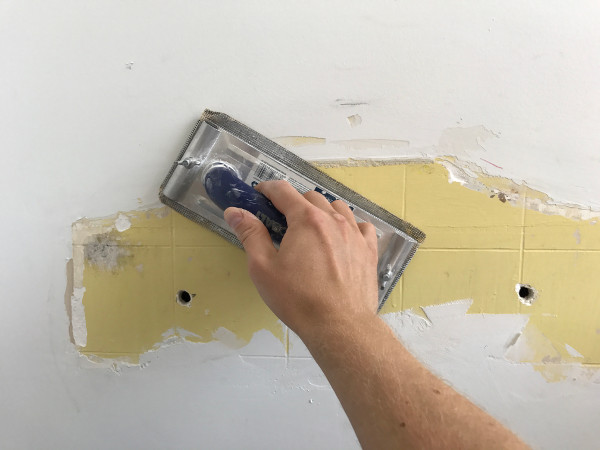
Step 3:
Sand the spackle lightly until smooth. Blend the edges into the wall, careful not to sand down to the patch. Repeat step 2, as needed. Paint over the area with matching paint.
Repeat as many times as you need to refresh your space and get back that security deposit. Next time, a stud-finder can help you anchor your heaviest pieces without sacrificing precious drywall.
Experts in Drywall Repair, Preparation and Painting
Does this sound like you? You’ve been itching to paint a room in your house. You glance with longing at the paint swatches in your local hardware store. You even visualize new wall hangings and furniture organization…but you still haven’t booked your local painters. Something is standing in the way.
Always Repair Your Drywall Before Painting
Painting over damaged drywall is like putting a Band-aid on an open wound. It doesn’t fix the problem. In fact, it doesn’t even hide it well. With drywall damage, you need to start at the source. You’ll be glad you did!
When your drywall is repaired properly, you can rest assured knowing that there are no underlying issues with your walls or ceiling. Plus, your paint will adhere like it’s supposed to. Take a look at the leading causes of damage, and see which one applies to you
The Top 3 Causes Drywall Damage
Water damage. We’ve all seen the ugly brown stains that come from water damage. If you’re not sure where the leak is coming from, that’s a good place to start. Once the repairs have been made, the drywall needs to be removed, replaced, and painted.
Loose drywall tape. When the tape between drywall sections comes loose, it tends to crack and peel in long strips. This can happen from an excess of humidity or from improper installation. Either way, it damages the paint, and the area needs to be replaced, patched, and painted.
Wear and tear. Whether it’s from furniture scuffs, swinging doors or an unfortunately placed elbow, drywall takes its share of dents and bruises. When the surface of the drywall is cracked or broken through entirely, some real repairs are in order.
The Essentials of Repairing Drywall
Unless you’re a bona-fide handyman, drywall repair is no easy DIY task. We recommend seeking out your local professionals. You’ll want a team that will