Home Inspection

Why Water Testing Is Important

Guideline: What You Need to Know About Clinical Laboratory Reagent Water

Whether you’re designing a new water system for a clinical laboratory, or if you’re checking the quality of your current system, you’re going to have to know the basics of CLSI standards and guidelines for CLRW. We’ll provide you with an overview, including some ways to prevent problems before they occur.

An international, interdisciplinary, not-for-profit, standards-developing, and educational organization that promotes the development and use of voluntary consensus standards and guidelines within the healthcare community.”

Global in scope, CLSI works with the laboratory community to “foster an excellence in laboratory medicine.” Their process for developing standards relies on input and consensus from industry, government and healthcare professionals.

What are CLSI Standards vs. CLSI Guidelines?

CLSI produces standards, guidelines and reports. When it comes to deionized water in a clinical laboratory setting, most lab managers are focused specifically on the guidelines and how they adhere to the lab’s di water system.

Standard: A document developed through the consensus process that clearly identifies specific, essential requirements for materials, methods, or practices for use in an unmodified form. A standard may, in addition, contain discretionary elements, which are clearly identified.

Guideline: A document developed through the consensus process describing criteria for a general operating practice, procedure, or material for voluntary use. A guideline may be used as written or modified by the user to fit specific needs.
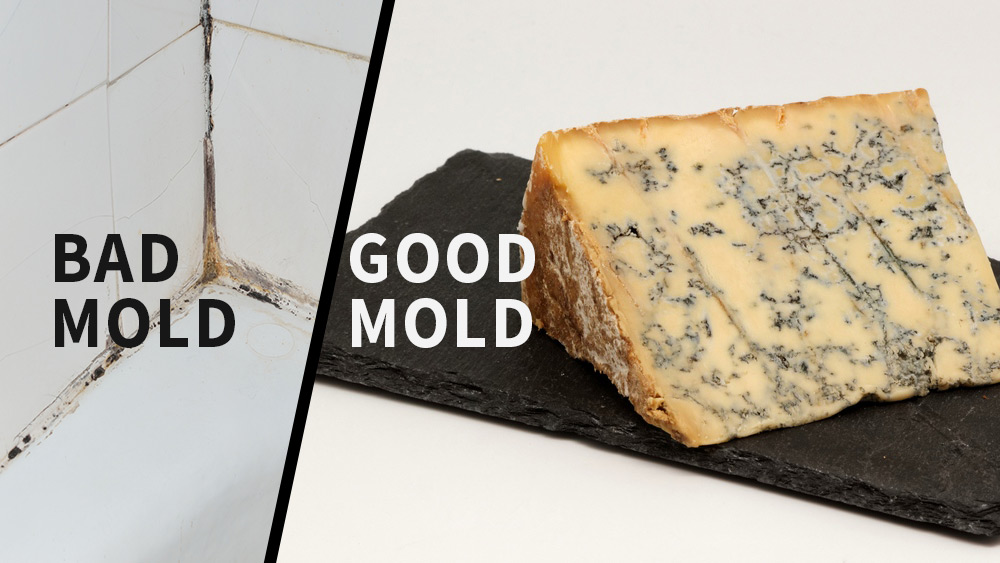
 

Hardness of Water

In scientific terms, water hardness is generally the amount of dissolved calcium and magnesium in water. But in layman’s terms, you may notice water hardness when your hands still feel slimy after washing with soap and water, or when your drinking glasses at home become less than crystal clear. Learn a lot more about water hardness on the Water Science School site.

Water Hardness

The simple definition of water hardness is the amount of dissolved calcium and magnesium in the water. Hard water is high in dissolved minerals, largely calcium and magnesium. You may have felt the effects of hard water, literally, the last time you washed your hands. Depending on the hardness of your water, after using soap to wash you may have felt like there was a film of residue left on your hands. In hard water, soap reacts with the calcium (which is relatively high in hard water) to form “soap scum”. When using hard water, more soap or detergent is needed to get things clean, be it your hands, hair, or your laundry

Have you done a load of dishes in the dishwasher, taken out the glasses, and noticed spots or film on them? This is more hard-water residue—not dangerous, but unsightly. Many industrial and domestic water users are concerned about the hardness of their water. When hard water is heated, such as in a home water heater, solid deposits of calcium carbonate can form. This scale can reduce the life of equipment, raise the costs of heating the water, lower the efficiency of electric water heaters, and clog pipes. And, yes, mineral buildup will occur in your home coffee maker too, which is why some people occasionally run vinegar (an acid) through the pot. The acidity of vinegar helps to dissolve mineral particles by making them charged. These newly charged particles become attracted to the positive and negative charges in water and can be washed away easily.

But hard water can have some benefits, too. Humans need minerals to stay healthy, and the World Health Organization (WHO) states that drinking-water may be a contributor of calcium and magnesium in the diet and could be important for those who are marginal for calcium and magnesium intake.

Measures of water hardness

Hardness is caused by compounds of calcium and magnesium, and by a variety of other metals. General guidelines for classification of waters are: 0 to 60 mg/L (milligrams per liter) as calcium carbonate is classified as soft; 61 to 120 mg/L as moderately hard; 121 to 180 mg/L as hard; and more than 180 mg/L as very hard.


How to Test Your Drinking Water

As a result, you need to learn how to test your potable water, so you and your family remain safe. Contaminated water consumed on a regular basis can lead to health problems.

Higher than acceptable levels of lead occur in potable water in 41 states, according to the Environmental Protection Agency. In 33 states, potable water tainted with industrial chemicals and pollutants has also been linked to health problems including cancer and hormone disruption

What Contaminants Are in Drinking Water?

Sometimes simple nuisance bacteria develop in water and can produce iron and sulfur, two dangerous contaminants. However, other bacteria cause disease. These include E. Coli and coliform which require medical treatment.

Many tests for potable water help determine if the following contaminants are present: arsenic, bromine, carbonate, copper, chlorine, cyanuric acid, fluoride, iron, lead, nitrates, nitrites and residual chlorine. These common elements can occur in safe levels, but the test materials explain what those are and the appropriate safe parameters.

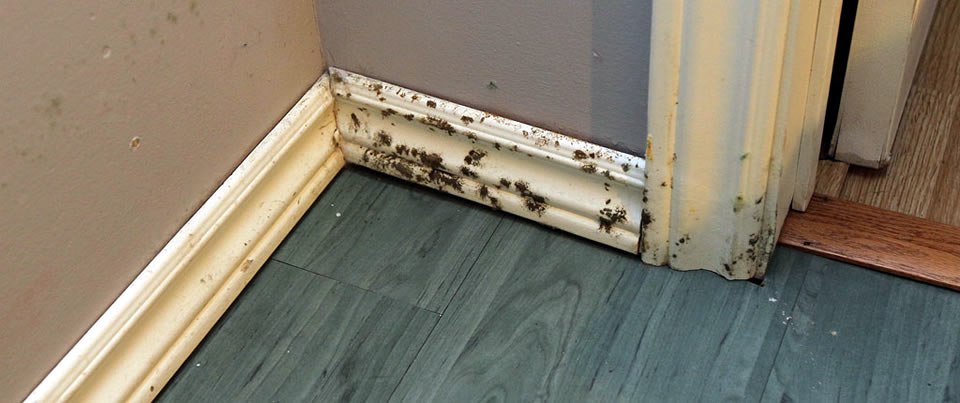
Its Hard to Detect Contaminants

While you cannot see these elements with the naked eye, you can see symptoms of their presence in your bathroom fixtures. For example, iron leaves yellow or orange stains on the bathtub, cement and sinks. Iron creates rust which contaminates your water with long-term consumption of rust causing serious illness. Manganese also stains fixtures, but in black or purple. Long-term consumption of it leads to declines in mental health and psychiatric issues.


Water Quality Results

Beaches and COVID-19 Transmission

Swimming at the City public beaches is not considered to be an important risk for transmission of COVID-19.  Water is not a favoured route of transmission for the virus that causes COVID-19. This virus preferentially transmits short distances (up to 2 metres) through the air by respiratory droplets from an infected person (from coughing, sneezing, shouting, singing, talking, breathing), by direct  contact with an infected person or by contact with a surface that an infected person has touched (and now, contaminated fingers bringing the virus to your eyes, nose or mouth).

To minimize transmission of COVID-19 when at a public beach or park:

Practice physical distancing from others in changerooms, washrooms and wear a mask for added protection in areas you cannot maintain at least 2 metres from others not in your group.

When in the water, on the shorelines and enjoying the park and picnic areas, practice physical distancing. While the risk of transmission of COVID-19 is much less outdoors than indoors, when there is significant crowding, as there could be at a pool or beach, there is greater concern about spread.

Physical distancing, wearing face masks, staying home when sick, and practicing good hand hygiene remain the best way to prevent the spread of the virus.

Water test results are not available immediately as they take at least 18 hours to process in the laboratory. For this reason, swim advisories are issued based on water sample results from the previous day, as well as our knowledge of water quality at each beach in previous years and how they react to factors such as rainfall and bird activity.

Public Health will not recommend swimming at beaches if:

the geometric mean of 5 water samples taken on the previous day is greater than 200 E. coli per 100mL of water ( water quality standard for beach water quality);

there is a significant rainfall event; or

we are aware of a situation that could impact the water quality at a beach.


Water Testing

Are you concerned about what is really in your drinking water?

Water quality is the physical, chemical and biological characteristics of water. The most common standards used to assess water quality relate to drinking water, safety of human contact and for the health of ecosystems

served many largest food and beverage industry, hotels, and restaurants for water testing. We have passed the audit process from various industries as an external laboratory. The analytical methods used are official methods

independent and internationally recognized testing, inspection and certification provider with many years of experience. people are competent specialists with specific additional qualifications for the different areas within the food testing and calibrations.

will support you with our know-how and will develop tailormade proposals for your company within a process which is fast, unbureaucratic, cost-effective and transparent.

Understanding And Preparing For A Home Inspection

The Complete DIY Home Inspection Checklist

Ready to Sell? Inspect Your Home Before You List

Whether you need more space as your family grows, you accepted a new job in a different city or you’re looking to downsize, selling your home can be an exciting — and overwhelming — time.

While there will be a lot going on as you prep your home to hit the market, don’t forget a simple do-it-yourself home inspection. Spending a little time and money before you list your home often pays off in the end. Not only will you be able to increase your asking price, but you’ll also avoid any snags if the buyer opts for a professional home inspection, which can lead to last-minute repairs before the sale closes.

DIY House Inspection Checklists for Sellers

Ideally, when you go through our seller home inspection checklists, you find your home in pretty good condition. Maybe just a bit of touch-up painting or drywall patching. But that’s not always the case. Sometimes there are bigger things like a leaking pipe or a broken downspout that need attention. There are also some problems that you might not even know about. Those are the issues that a DIY home inspection will often bring to light.

We gathered the most common repairs to check for, both indoors and outdoors, as you prepare to sell your home. While our checklist will give you plenty of items to consider, it is not a replacement for a professional inspection. Rather, it is intended to give you an idea of what professionals looks for so know what to expect.

Areas to Inspect Inside Your Home Before Selling

As you work your way through the checklist, it pays off to think like an inspector. If you notice it was hard to access an area for your DIY inspection, it’s probably going to be difficult for a professional, too


What home inspectors can and cannot tell you

After all the house hunting and hand-wringing, you’ve finally made an accepted offer on a home. Now, if you’re like many buyers, you’ll hire a home inspector to cast a critical eye on the property.

But while a good inspector can give you a thorough assessment of the home’s condition, alerting you to potential safety hazards, problems big and small, and what costly repairs might be in your future, there’s a limit to what they can tell you — and even the best ones can’t see through walls.

Despite new tools such as infrared cameras and moisture meters, the process is still “a visual inspection of readily accessible areas,’’ Popp added. “We don’t necessarily speculate with any authority about what may be inside the walls.’’

Still, a well-trained eye can detect dozens of clues about the condition of a house that buyers might otherwise overlook. “One of the most revealing things is the condition of the roof. People just don’t think about it too much; they might give it a passing glance,’’ Popp said. “If those roof shingles look like burnt bacon — you know when you overcook bacon it gets crunchy and puffy looking — occasionally you’ll see roof shingles like that, and they’re done.’’ And if there’s tar smeared in spots or on the base of the chimney, that signals a stop-gap repair that will need attention.

Popp explains all this to buyers as they circle the home together, starting outside from across the street. You should attend your inspection and participate as much as the inspector allows, he added. “I encourage people to stay right at my elbow, and I’ll explain things to them and answer their questions as I go around,’’ he said, starting with the exterior elements like the roof, gutters, wood trim, siding, window components, doors, porches, and decks. Then he brings them up close to inspect the siding and look for telltale problems like sagging gutters before heading inside to look at the living space and, crucially, the basement.


Other Mistakes Buyers Shouldn’t Make During the Home Inspection

The house-buying process can seem endless: Attending open houses. Separating your must-haves from nice-to-haves. Identifying your (sort of) dream home. Making an offer. Negotiating the final price. So when you get to inspection day, it’s tempting to heave a huge sigh of relief now that your work is basically done.

But not so fast. The home inspection is one of the most crucial steps for buying a home, and it shouldn’t be overlooked or rushed. In fact, the inspection process has the potential to be just as nerve-racking for the buyer as it is for the seller. What if you’ve fallen in love with a beautiful home that has major problems lurking beneath the surface?

Forgoing an inspection in the first place

Sure, most people know they should get an inspection on a home they’re buying from someone else

Choosing the cheapest inspection option

There are a lot of inspectors who offer very low prices for home inspections, Marlow says, and that could indicate they’re new and inexperienced, or that they’re having trouble finding clients.

Not being present for the inspection

Tempted to let the inspector just do her job and read the report later?


Increase Your Professionalism From the Moment You Arrive at a Home Inspection

Boost your home inspection referrals and client satisfaction by following these simple guidelines. Get tips on arriving to your home inspection from Kaplan’s instructor, who has been a home inspector for over 20 years. Learn how to show your customers you value their time from the moment you arrive to the time you finish.

Video Transcript

To begin an inspection, it’s absolutely critical that you arrive on time. As a matter of fact, I like to arrive about 15 minutes early. Why? I want to show the customer that I value their time. That means if they’re waiting for me, I’m going to be concerned about how they’re going to begin to feel about me. So, I’m here early. The second thing that’s really critical about a home inspection: to look professional is to bring equipment that’s clean. Don’t bring a ladder that you’ve been painting your bedroom with last night. Bring a clean ladder. Bring clean drop cloths. Bring clean booties. Keep in mind that these people haven’t bought the house yet, but they’re most likely going to. You want to show respect to their new home. You don’t want to be walking around their carpet, leaving things behind.

Make sure, again, that as you come up to the door and knock on the door, give people time to come to the door. You’d be amazed. They could be in all other parts of the house, and it’s going to take them a while to get there. What you don’t want to do is to come in and surprise somebody. Boy, that’s embarrassing. It can be, again, very, very bad for the customer relationship issue. What I like to do when I get here early is I begin to prepare my report. I begin to fill out things that are kind of general comments, the style of the home, the type of the shingles, and things like that prior to the customer getting here. The other thing that I would encourage you to do as we go throughout the house for the entire inspection is: digital photography is really in the marketplace now. It gives you a little bit of an edge, being able to explain to people what you’re looking at, what you’re seeing, and what’s good and what’s bad.

Remember that you can overuse digital photography. So, don’t make it a showmanship attitude. Make it a, “I need to show somebody something.” Communication is the number one key to the success of a home inspection. If I can both in writing and verbally explain myself well to my customers, I just won the battle, and I haven’t even started the inspection yet. The more you can prepare before the customer comes here, the less you’re going to be inconveniencing them. That’s just good business, and I encourage you to do that. I would also encourage you to, one more time, just check their name so that when you do get out and greet them, and they should be here in a few moments, you’ll be able to call them by their first name. Boy, that’s just great marketing.

The other thing that you want to pay attention to after you’ve set the ladder up on the house is to be concerned about damaging the home. If you looked up here, these are brand new gutters. I wouldn’t even consider putting my ladder up on those gutters. So, I chose to lean it against the stucco. I’ll work around some of the products that the seller has, so that I don’t damage those products. So, prepare yourself. Then, when they arrive… Oh, by the way. Here they come now.


How a home inspection works

After getting a mortgage, picking a great house, and making an offer, you might assume most of the heavy lifting in the home buying process is done. But wait—there’s one more big thing that could determine whether or not the home you’re hoping to buy is a good decision: the home inspection. No matter how invested you feel in a particular house, it’s important to get a professional opinion from a trustworthy home inspector and factor the results into your home buying decision.

What is a home inspection?

A home inspection is a report generated by a professional home inspector after they make a careful evaluation of a property. It’s intended to give home buyers an unbiased, knowledgeable accounting of any identifiable issues a home has before they make the final decision to buy it.

A home inspection typically takes place while a home is under contract—which means you’ve made an offer on a house and it’s been accepted. A buyer has a set period of time, which is laid out in their purchase agreement (it’s often a week to 10 days, but it varies) to complete the home inspection, review the results, and decide if they want to leave the contract. Under most purchase agreements, the buyer can leave the contract without a financial penalty if the home inspection reveals costly issues.

What will be covered in the inspection?

The inspector will do a visual evaluation of the house. According to the American Society of Home Inspectors (ASHI)

this review includes noting the condition of the following things:

heating system

central air conditioning system (weather permitting)

interior plumbing

interior electrical systems

roof, attic, and visible insulation

walls, ceilings, floors

windows and doors

foundation, basement, and structural components

Tips To Do Good Mold Remediation

Tips To Remediate Mold in Your Home

Monitoring Indoor Air Quality is Key to Mold Remediation

Air quality monitoring is necessary to fight mold effectively. Keep in mind that mold thrives with moisture while releasing spores and VOCs – all three types of pollutants can be detected by sampling indoor air.

Keep Relative Humidity Below 60%

If you visit the website on mold by the US Environmental Protection Agency, you will notice that they emphasize the relationship between mold and moisture. Basically, mold is alive and it requires moisture to stay alive and spread; controlling humidity is easier and more cost-effective than cleaning mold on an ongoing basis.

Prevent Moisture Condensation

The complement to controlling air moisture is preventing its accumulation on indoor surfaces. To prevent this, the following measures are recommended.

If You Find Mold, Make Sure It Is Cleaned Properly

If you find mold growth in your home, the first step is deciding between cleaning it yourself or hiring a mold remediation company. The US EPA suggests professional remediation for any mold growth larger than 10 square feet, of if there has been extensive water damage. Most international standards agree that occupants can clean mold on their own if the area does not exceed 1 m2 (roughly equivalent to 10 ft2).

Avoid Wasting Time and Money with Ineffective Measures

When dealing with mold, avoid measures that don’t address the problem effectively. They are just a waste of time and money.


Tips For How To Handle Mold Remediation

Understand Moisture’s Role in Mold Formation.

Evaluating mold in home infestation involves more than a visible check for mold growth behind wall, flooring, or in corners. For that reason, any commercial mold damage assessment requires analytical approaches. Understand that the presence of free moisture affects mold growth significantly. Secondly, familiarize yourself with how moisture originates and gets into your home. As a homeowner you must determine the sources of moisture in your property and use its presence to locate mold growth; SERVPRO of Lynnwood specializes in providing these services at competitive prices.

Create an Appropriate Remediation Plan and Documentation.

Document your mold situation in writing, video, or photography. Documentation assists cleanup experts to develop an appropriate mitigation strategy. Details of the plan include what renovations or repairs are scheduled, necessary evaluation tests, or tenant relocation during remediation. A mitigation plan helps you manage liability and identify mold growth trends.

Identifying Mold Contamination Extent

As indicated before, growing mold in home can be deceptive, so it is necessary to determine the extent of contamination in your home. Determining your level of contamination influences the approach used in addressing mold damage within your home and lets you avoid exposing others to contamination.

Mold Mitigation

Mitigating mold growth involves a combination of various methods inclusive of Level 1 and Level 2 remediation practices. Both levels comprise the following listed steps: Fixing leaking plumbing. This approach significantly reduces mold growth, black mold, fungus, mildew as well as using deodorization to eliminate smelly odor. Isolate contaminated areas; this entails closing all windows and doors on contaminated doorways, and other access conduits. These help to avoid the spread of black mold, fungus, mildew, dry rot, and mold spores to other locations within the home as well as reduces smelly odor.  Use misting and deodorization to reduce smelly odor caused by growing mold. Discard all mold-infected, black mold, fungus, mildew, dry rot, and other materials using appropriate disposal bags. Entrust the removal of contaminated material to a certified restoration company; such as the team at SERVPRO of Lynnwood. Ensure that you clean all wood surfaces and nonporous materials of any mold damage, dry rot, mildew, fungus, or black mold. Perform a visibility test. Inspect all infected areas of any visible contamination and mold debris, dry rot, black mold, fungus, mildew.

Evaluate the Mold Removal Plan The last step in this activity is determining whether the mold removal project achieved its objectives. Pay particular attention to any mold growth behind wall. You should implement a comprehensive mold mitigation strategy to avoid future issues.


Mold Removal And Remediation: How To Get Rid Of Mold

What Is Mold?

Mold is a fungus that reproduces by expelling microscopic spores into the environment. When these spores land in a damp environment, they grow and spread and can potentially cause rot. Mold thrives in damp environments, such as bathrooms, kitchens, attics, basements and crawl spaces.

Identifying Different Types Of Mold

Mold comes in many different forms; in fact, according to the Centers for Disease Control and Prevention, there are probably tens of thousands of types of mold, if not more. While many types of mold are harmless—and in nature, mold even plays an important role by breaking down dead leaves, plants and trees—in your home, harmful types can lead to respiratory distress, manifesting itself in symptoms that include stuffy noses and wheezing. The effects will be more intense for those who are allergic to mold or have asthma.

Alternaria

This type of mold, which can cause asthma-like symptoms in the upper respiratory tract, is frequently found in showers and tubs, beneath leaky sinks, and in homes that have recently suffered flooding or other water damage. It has a velvety texture with dark green or brown hairs.

Aureobasidium

Typically found behind wallpaper or on painted or wooden surfaces, this mold starts as a pink, brown, or black hue, then turns to a dark brown as it ages. This type of mold can cause eye, skin, and nail infections.

Black Mold (Stachybotrys)

This mold appears slimy and black or dark green and is commonly found in organic materials such as wood, hay, and cardboard. It is also known as “toxic mold” because it releases mycotoxins that can cause a host of medical issues, including difficulty breathing, sinusitis, fatigue, headache, a burning sensation in your airways, a persistent cough, nose bleeds, fever, and even depression.


Mold Removal Tips You Should Know About

Find The Source

First, you have to find the source of the mold. The most common culprits include leaky pipes and cracks in the foundation. Not having windows and doors properly sealed are often the source of mold, and so is damage to the roof, condensation, and poor ventilation. If you have mold in your home, the chances are it’s because of one of those.

Perform Inspection To Find Mold

You want to perform a thorough inspection of your property. The objective is to find visible signs of mold. Even if you’ve found the source and have found a tiny amount of mold, you still want to do an inspection. Mold can quickly spread, so simply finding the source and removing the small traces of mold near the source probably won’t be enough.

Use Mold Removal Methods

You’ll want to mix a bit of baking soda with water and use the mixture to clean away the mold. Bear in mind this is only recommended if you have a small amount of mold that needs to be removed. While you’re at it, use a dehumidifier, as this will remove moisture from the room and the area where the mold has developed.


COMMERCIAL & RESIDENTIAL CLEAN-UP & RESTORATION

Mold prevention

Mold needs moisture and oxygen to grow, which means mold can grow on virtually any organic substance. While it is impossible to eliminate all mold and mold spores in an indoor environment, moisture control is the key to mold control. Some steps to thwart mold include.

Signs of mold

Indoor mold growth may not be obvious. It can grow unnoticed on hidden surfaces—on the backside of dry wall, underside of carpets or pads, or hidden within utility tunnels.

Taking care of mold

Mitigating the risk of mold and exposure to mold is relatively easy, if property managers handle the problem correctly. Here’s how to find a mold expert.

Tips To Use Mold Remediation In Your Home

Tips for Finding the Best Mold Remover Company

Regardless of whether you live in an apartment building, a suburb, a mansion, a boathouse, or any other conceivable residence, you run the risk of having mold. It is not a pleasant thought, but it is a stark reality. Mold develops when conditions are just right, damp, warm, etc. and every building can potentially develop a mold problem at any time. When this happens, it can be difficult to know how to handle the situation. Should you simply clean it, buy special products, or call a professional? Unless the problem is incredibly minimal, the answer is almost always to call a professional. Now the question is, how do you find a mold removal company? Because it can be difficult to find a great mold remediation company, many people simply choose one at random. Thankfully, there are ways to better choose a company that will be the best choice for you and your situation. This is exactly what you will find here, a list of tips and advice to help make a better, more informed decision.

When you discover a mold problem, it is always recommended to call in a professional; however, the first thing you need to do is attempt to determine if there is an underlying cause. Mold grows and flourishes in very moist conditions, therefore a mold problem may be caused by a leaky roof or water pipe leak. If this is the case, this will need to be addressed every bit as much as the mold itself. If the underlying problem is not dealt with, the mold will come back. If the problem is a leaky roof, look into repairing or replacing the roof. If the problem is a burst or leaking pipe, call in a plumber as soon as possible


Tips on Mold Removal, Testing, Prevention and All Other Things Mold!

Speaking of our health, so called “Black Mold” typically refers to molds that can produce toxins (specifically mycotoxins), such as groups of molds known as Stachybotrys. Mycotoxins will not always be produced when these types of mold are present. To put it another way, the presence of mold does not necessarily mean mycotoxins are present. The conditions needed for mycotoxins to be produced are not fully understood. Further, mycotoxins can be produced by other types of molds besides Stachybotrys and these molds are not always black. But all visible molds, regardless of color, should be removed. (We discuss removal tips in the next section, “Mold Remediation and Mold Removal.”)

Mold is a natural organism that serves many useful purposes in daily life. It breaks down dead organic matter, helps make certain cheeses and antibiotics like Penicillin. Mold only becomes a problem when it is found in elevated levels. Then, mold removal and remediation should be performed.

Molds reproduce by releasing microscopic airborne spores that find their way to a habitable surface. Molds can grow on almost anything, including most building materials such as drywall, insulation, wood, etc. If enough water is present on these surfaces, the mold grows into active colonies and releases spores into the air.

While mold grows most easily on porous organic surfaces such as drywall and unfinished wood, it can also grow on inorganic surfaces such as metal, plastics and glass when organic nutrients such as dust and debris are along with moisture.

You can be exposed to mold by breathing in mold spores or touching and/or ingesting moldy items. And under ideal conditions, active visible mold colonies can grow in as little as one or two days.


How to Choose the Best Mold Remediation Company for Your Home

Licensed and Insured

There is simply no excuse for a mold removal company not to have the appropriate licenses and insurance for your area. Ask for this documentation right up front, and if it is not provided, move on to another option. You shouldn’t accept any kind of excuse for the lack of these items, as any reputable company will have them in place. There are too many good companies available to take your chances on one that is not licensed and insured.

Collect at Least Three Quotes

While you do want to have this work completed quickly, you don’t want to rush into the job so fast that you hire the first company to come along. Make it a goal to ask for quotes from at least three different remediation companies. Most contractors will be happy to provide you with a free written estimate for their services. You don’t necessarily want to go with the lowest quote every time, but price is obviously a factor which will be taken into consideration, as well as the timeline which is offered.

Ask for References

As a last step before you make your choice, ask all contractors you are considering for references from past customers. Any good contracting company will have at least a few references which you can check on to make sure they live up to their promises. Don’t just ask for the references and then let them sit on your desk – actually make a few phone calls to gather opinions. Also, you can check reviews which have been left on the web to get an idea about the reputation of each remediation company in the running.


HOW TO FIND THE BEST MOLD REMEDIATION COMPANY

Experience Is Crucial

The mold remediation process is tricky, which means you need to work with a company that has years of industry experience. This ensures they have the equipment and know-how to remove mold effectively.

Check for Industry Certifications and Licenses

It’s important the mold remediation specialists you work with hold licenses and certifications. This means they’ve gone through the proper training and are highly educated.

Ask About Insurance

In addition to holding certifications, the company you work with should also carry insurance. This protects you if any damage occurs during the mold remediation process.

Read Customer Reviews

It’s now commonplace for consumers to check online reviews before buying products or hiring a company. This is a great way to get a firsthand account of the type of work a business does.

Ask for References

When trying to find the best company for your needs, there’s nothing wrong with asking for references. Any reputable business won’t mind providing you with some.


Mold Remediation: How to Remove Mold

How to Get Rid of Mold Overview

Mold is a major-league nuisance. It blackens the grout lines in your shower, discolors drywall, shows up as black spots on siding, darkens decks, and grows on and rots damp wood everywhere. Even worse, it can be bad for your health. Mold releases microscopic spores that cause allergic reactions, runny noses and sneezing, as well as irritating, even injurious, odors. We’ll cover how to remove mold, how to get rid of black mold, how to kill mold on wood and what kills mold in a few steps.

How to identify mold

Mold is everywhere. It’s a type of fungus that grows from tiny spores that float in the air. It can grow almost anywhere that spores land and find moisture and a comfortable temperature, between 40 and 100 degrees F. Typically that includes about every damp place in your home.

Removing large infestations requires precautions—and work!

You can scrub away the surface mold common to bathrooms, decks and siding in a matter of minutes with a 1-to-8 bleach/water mold cleaner solution as one way on how to remove mold. But often mold grows and spreads in places you don’t notice, until you spot surface staining, feel mushy drywall or detect that musty smell.

Cleanup and repair

Complete the initial cleanup by vacuuming up the debris. Thoroughly clean the wet/dry vac afterward by disposing of the filter and washing out the tank, hose and attachments with the bleach-and-water solution.