April 2020

Use Tax Planning To Make A Better Company

How to Pay Less Taxes

The idea of tax planning is to arrange your financial affairs so you ultimately end up owing as little in taxes as possible. You can do this in three basic ways: You can reduce your income, increase your deductions, and take advantage of tax credits.

How to Reduce Taxable Income

Your adjusted gross income (AGI) is the key element in determining your taxes. It’s the starting number for calculations, and your tax rate and various tax credits depend upon it. You won’t be able to qualify for certain tax credits if it’s too high. The more money you make, the higher your AGI will be and the more you’ll pay in taxes. Conversely, you’ll pay less in taxes if you earn less.That’s the way the American tax system is set up. And it all begins with that magic number—your AGI.


Feed the IRA, lower your taxes

One reason that financial advisers consistently recommend contributions to a retirement plan as the best way to reduce a tax bill is that most of those contributions—depending on the type of plan—are essentially tax write-offs that don’t require itemization.

Because the money you contribute to a traditional IRA is a pre-tax contribution, it lowers your total taxable income. This means you will owe less in income taxes, regardless of whether you itemize or take the standard deduction. And because in recent years contributions made until the tax deadline have been applied to the return for the previous year, they have been popular among people who scramble to soften the blow of a large tax bill.


Invest in Municipal Bonds

Buying a municipal bond essentially means lending money to a state or local entity for a set number of interest payments over a predetermined period. Once the bond reaches its maturity date, the full amount of the original investment is repaid to the buyer.

Municipal bonds are exempt from federal taxes, and may be tax exempt at the state and local level as well, depending on where you live. Tax-free interest payments are what make municipal bonds attractive to investors.

Municipal bonds historically have lower default rates than their corporate bond counterparts (for investment grade securities, the default rate is 0.1% for municipal bonds versus 2.28% for corporate).However, municipals typically pay lower interest rates. Because of the tax benefits, bondholders must understand their tax equivalent yield. The higher your tax bracket, the higher your tax equivalent yield.


Deduct Half Your Self-Employment Taxes

The government assesses a 15.3% Federal Insurance Contributions Act tax on all earnings to pay for the Social Security and Medicare programs.

While employers split the cost with their workers, self-employed individuals are responsible for paying the entire amount themselves. To compensate for the extra expense, the government will let you deduct 50% of the amount paid from your income taxes. You don’t even need to itemize to claim this tax deduction.

Itemize State Sales Tax

Taxpayers who itemize their deductions can include either their state income tax or state sales tax on their Schedule A form. The state sales tax break is a great option if you live in a state without income taxes.While taxpayers can use a table provided by the IRS to easily claim their sales tax deduction,  remember to add on the sales tax from any major purchase such as a car or boat.

The federal tax deduction for state and local taxes is capped at $10,000 from all sources.


Make a charitable donation

Making donations to charity is tax-free. Either yourself or the charity can claim the tax back through Gift Aid. If you pay higher or additional-rate tax, you can also claim back the difference to the basic-rate on any Gift Aid donations.  To do this, you need to claim on your self-assessment tax return or ask HMRC to adjust your tax code. As a basic rate taxpayer, a £1.25 donation will cost you a pound. For higher rate taxpayers, you’ll pay just 75p. Keep records showing the date and amount you have donated.

Maximise your personal savings allowance

In 2020-21, you can earn £1,000 of interest on savings tax-free if you’re a basic-rate taxpayer. If you’re a higher-rate taxpayer, your tax-free allowance is £500.  You’ll only pay tax on savings income that exceeds this threshold. This will no longer be deducted automatically by the savings provider. If tax is due, you’ll need to pay it via self-assessment or have it deducted via PAYE. Keep in mind that you won’t have a savings allowance as an additional-rate (45%) taxpayer.

Find The Best Roof Inspection In Your Place

Tips for Choosing the Right Roofer for Roof Repair and Inspection

Client Testimonials and Referrals

Explore client testimonials and reviews on websites like Google and Yelp! If an owner attempts to publish a review, then you can be sure that the roofing contractor you are considering will deliver superior roofing system! Check out their website and know if they have a client testimonial section!

Knowledge About Specific Roof Types

Search for roofers that are skilled in the type of work you need. You need to select a roofer with hands-on experience in setting up the specific roofing system that you need to install in your home. Discuss with the prospective roofer to confirm if they are familiar with installing your desired roofing system.

Knowledge in Roofing Construction

Unfortunately, not all roofers are knowledgeable in roofing construction. Be particular when picking a roofing company and inquire about the following:

  • Are they aware of the existing codes and building needs?
  • Are they licensed with the roofing manufacturer for your particular roof?
  • Do they have the required knowledge about inspecting ventilation systems?
  • Are they skilled in reviewing roof decking?
  • Will they be taking off the current shingles and beginning with a new roof deck?
  • Are they affiliated with the BB with a decent rating?

Work Portfolio on Website

Ask if they have a website and try to browse through their certifications. A professional website will provide you with full information on the various services and credentials that the company holds besides a portfolio that will divulge multiple samples of their work! A roofer lacking a website in today’s market scenario is not the greatest roofing professional in your area!

Emergency Services

You should confirm whether or not the roofing contractor offers roof repair and inspection services after business hours. Will they provide help in case your roof breaks down unexpectedly? Many people fail to consider unexpected situations, therefore it is important to ask if your roofing contractor provides emergency repairs.


TIPS FOR CHOOSING THE BEST ROOFING COMPANY

Look for Professionalism

Only work with a certified and insured roofer–the marks of professionalism. The contractor that you choose to work on your roof should licensed and have workers’ compensation and liability insurance. When you contact a roofer, ask to see their certificates and take the time to call their insurance carrier to verify enrollment. This prevents you from being held liable for any accidents that happen. Plus, it protects you should there be an issue with your roof in the future.

Choose a Local Roofer

Hiring a local roofing professional is beneficial for several different reasons. First, it makes it easier to contact them should there be a problem with your roof in the future. While a 5-year warranty on their work is great, it doesn’t do you any good if you can’t track them down at the end of that time. Also, it’s best to get annual maintenance services from a local roofing company because it’s better and easier to build a relationship with them. Read reviews to make sure that the business you choose has built up a good reputation in the community before you hire them.

Don’t Go Too High or Too Low

Never hire a roofer based on price alone. While you do want to get a good deal on the services you need, price should never be your determining factor. Cheap bids drive down the market. In the long run, you get what you pay for. Hire your contractor based on the quality of work that they do. Then you won’t be paying an arm and a leg to fix their shoddy work in the future.

Get Everything in Writing

To protect both you and the roofing company, make sure that all aspects of the job are well understood. Get a written quote for services and write down the details of their assessment and the work they intend to do. Finally, make sure that you don’t hand over the payment for their services until you’ve inspected everything yourself. By setting clear expectations, it’s easier to avoid frustrations.


Tips to Help Homeowners Choose the Right Roofing Contractor

Know your material choices. A contractor who does not offer you different shingle options is not looking out for your best interest. The style and color of the shingles you install can affect the resale value of your home. If the insurance company is paying for a new roof, it may be the perfect time to make a change and upgrade to a more unique style that suits your taste. GAF contractors can offer extensive design and color choices for your home. Check out the choices now so you’re ready. Knowledge is power.

Don’t give in to pressure. Watch out for a contractor who pressures you to sign a contract before the insurance company has estimated the damage. Some contractors say they can work with whatever your insurance company settles upon, however the homeowner needs to ensure it’s not just any amount, but the right amount. The contractor should thoroughly examine the home and check that their insurance adjuster didn’t miss any damages.

Handle your own claim. A contractor who says they are “a claim specialist” or can “handle your insurance claim” may be breaking the law. In most states, it is illegal for contractors to act on behalf of the homeowner when negotiating an insurance claim. Any contractor who opens the door to potential legal action is not acting in your best interest.

Pay your deductible. Any contractor who claims they can handle the repair without having the homeowner pay their insurance deductible is committing insurance fraud and endangering the homeowner. The insurance deductible is the responsibility of the insured, and the contractor should reflect that in the quote without inflating the estimate to cover all or part of the deductible.

Check for proper licensing and insurance. The contractor should have insurance for all employees and subcontractors and be able to provide a copy of their insurance certificate for validation. Not having adequate insurance could potentially lead to litigation between a contractor and homeowner if a roofing employee sustains an injury at the home. Most states require licensing for contractors, but that does not stop unlicensed contractors from attempting to do the roofing work. In states where licenses are required, make sure your contractor provides you with a copy of their license and confirm their status online. GAF Master Elite® Contractors must hold appropriate levels of Workers Compensation, at least $1 million worth of General Liability coverage, and have proper state licensing where they are performing the work.


tips to help you choose the best new roof for your home

Schedule an appointment with a professional.

Once you’re armed with the necessary information, it’s time to give Trinity Home Renovations a call and share the fruits of your research. Keep a folder with questions to ask and perhaps photo inspiration of roofs from magazines or the internet that you think will work best on your home.

Get to know warranties.

Roof warranties are important, but many homeowners don’t take the time to ask about them. The warranty on the materials differs from the service warranty, so you’ll want to know about each one before making a decision. Keep in mind that most roof warranties are written by manufacturers and last 20-50 years, but the service warranty depends on the policy of your roofing contractor.

Research and understand the different types of materials.

Research is probably the most important part of the roof shopping process. After all, if you leap blindly into shopping without knowing what, exactly, will suit your needs, it’s very likely that you will spend more money than you wanted to and end up with a product that lets you down. The main materials for roofs include asphalt, slate, wood and metal. Each one has its own advantages and disadvantages, such as cost, durability and length of life, so be sure to read up on each. At Trinity Home Renovations we use GAF Timberline HD roofing shingles, North America’s #1 selling shingle gives you value and performance in a genuine wood-shake look.

Don’t get hung up on the color.

If you type phrases such as “picking out a roof for your home” in a typical search engine, a lot of articles will come up about the color and look of your roof. While this can be “the fun part” of giving your home a new roof, it is not the most important. The main point of a roof, after all, is protection, and you’ll want to carefully consider the materials and durability over everything else.

Consider your household lifestyle.

Before you even start roof shopping, think about the lifestyle and longevity of your home. Will you be living there for a long time, or do you plan to move, perhaps when the family grows? And what kind of climate or weather does your roof need to withstand? These are important questions to ask before you start researching the various roofing materials.


A Roofing Inspection Checklist to Get Ahead of Problems

A roof inspection is one of those preventative maintenance jobs that’s easy to overlook. Don’t. Add a once-a-year reminder on your calendar to go out on a warm day and address any roof problems you find.

If you’re squeamish about heights, don’t worry. You can do a thorough inspection from the ground using a pair of binoculars.

Or, you can get up close and personal with your roof using a ladder. However, there’s no need to get up on your roof just yet. The less you walk around up there, the better for your roofing — and the safer for you. Work your way around your house, noting any potential problems.

Here’s a roofing inspection checklist:

  • Cracked caulk or rust spots on flashing.
  • Shingles that are buckling, curling, or blistering.
  • Missing or broken shingles.
  • Cracked and worn rubber boots around vent pipes.
  • Missing or damaged chimney cap. (OK, that’s technically not part of your roof, but since you’re looking anyway.)
  • Masses of moss and lichen, which could signal the roof is decaying underneath. Black algae stains are just cosmetic.

Tips To Make Residential Painting

Residential Painting – Tips and Techniques to Resolve Painting Troubles

Residential painting is another term for home painting. Professional house painters like us are experts to painting the exterior and interior of single family homes. Whenever you hire a us, you can rest easy knowing that a group of painters will work hard to improve your home with aesthetic and structure. Not only are we capable to change the look and texture of your house, but we can cater services to you or your family’s needs as you stay in your home.


Techniques That Makes a Professional Residential Painter

Along with an eye for details, professional painters have special techniques they use to ensure the best possible paint job occurs when painting your home. People may believe that these techniques are secret that professionals learn in training, but they are everyday techniques that non-professionals can do too. Some techniques include:

  • Sanding away imperfections before painting. Starting with a perfectly smooth wall will help to have a perfectly painted wall with no lumps and bumps.
  • Using tape to cover areas you don’t want to get paint on. This is a standard practice to use on baseboards, but it can also be used to create painting patterns on walls.
  • Pressing the tape down with a putty knife to reduce air bubbles. Nothing is worse than finishing a paint job, thinking it all went well, then when you go to peel the paint off the baseboards you find that some paint bled through. Pushing it down with a putty knife ensures that nothing bleeds through.
  • Using paint extender to eliminate brush strokes. Paint extender, also known as paint conditioner, slows down the drying time for paint which allows you to put more than one coat on and not get a slew of different brush strokes.


Common Paint Problems & How to Fix Them

Learn what causes the peskiest paint problems—and how to fix and avoid them in the future.

Cracking, Flaking, and Clumping

Repair and Prevention: If damage is extensive, you may need to repaint the entire surface. If not, with the right technique, you can repair a poorly painted spot without a lot of headache. Follow the tips detailed below for solutions.

  • Remove all cracked and flaking paint with a scraper, wire brush, heat gun, or chemical application (depending on the extent and severity of the problem).
  • Sand, feathering the edges to blend, then clean and prime the surface.
  • Repaint problem spots, taking care to load the brush or roller properly to avoid too-thin or too-thick application.
  • For brush application, dip the brush in, allowing paint to cover up to one-third of the bristle length; tap the brush lightly on both sides and avoid dragging the brush against the edge of the container.
  • If using a roller, fill the roller tray halfway. Remove lint from a new roller cover, dip the roller into the well of the tray, then over the ribbed portion of the tray, repeating several times to evenly distribute the right amount of paint.


Alligatoring and Checking

Repair and Prevention

  • Remove the old paint, then sand, prime and repaint with a flexible latex-based paint.
  • Use high-quality latex paint.

Efflorescence

Repair and Prevention

  • If moisture is getting into the masonry wall, eliminate the source of moisture by properly tuckpointing any cracks or missing mortar in the wall or patching concrete with a latex concrete patch; clean out gutters and downspouts, and caulk joints around windows and doors with a butyl rubber caulk.
  • If moisture is migrating through the wall from the outside (e.g., basement wall), apply waterproofing to the outside of the wall.
  • Remove all efflorescence and any loose flaking, chalking paint with a wire brush, scraping, or power washing. Then clean the area with a trisodium phosphate cleaning solution and rinse with clean water. Let completely dry, then paint with a high-quality latex house paint.


FROSTING- How to Fix It

Once property owners take preventative steps, they can progress to repairs. As distressing as the appearance of these marks may be, frosting damage can be surprisingly simple to remedy with the right tools.

  • For mild frosting issues, gently wash the affected surfaces with warm water to test the deposited crystals for water solubility. If the marks dissolve after applying water, repeat this process until any flaws disappear.
  • Stubborn cases may require the use of soft brushes for gentle clearing of heavy deposits. Once excess material is cleared, clean the affected areas.
  • Apply quality alkyd primers to the exposed surfaces. These primers adhere well to a wide variety of surfaces, including wood.
  • Once the primer cures, retouch the damaged areas with a matching paint.

The Best Way To Handle Mosquitoes

How to Find and Kill That Single Mosquito Buzzing Around Your Room

The flashlight hunting method

If you’re interested in trying this strategy, do the following:

  • Grab a flashlight and turn off all the lights if they’re not already off.
  • Turn on a single, small light source—a lamp, phone, tablet. Keep your flashlight off for now.
  • Roam the room slowly and listen for the buzzing. After a few minutes, the mosquito will likely make its way toward the light source and land on the wall nearby.
  • Turn on your flashlight and hold it flat against the wall, then move the beam along the wall.
  • Eventually, the light will hit the mosquito and create a large shadow so you can find it and smash it.


Best Ways to Get Rid of Mosquitoes in Your House and Yard

Tried and True Ways to Get Rid of Mosquitoes, Proven by the Scientists

To sum up, let’s summarize our investigation and list all 7 methods which will surely help you get rid of mosquitoes. We’ll start with the simplest mosquitos repellents and finish with the most hardcore ones, used by the professionals.

  • Mosquito nettings are usually simple to use and cheap. Use them as a permanent preventive measure on your windows and doorways and, if necessary, cover beds (including child cradles) and prams with them when outside. Choose the most suitable netting.
  • Homemade & natural repellents are your choice if you’re want everything natural and organic. Some plants and oil can drive mosquitoes away.
  • Ready-to-use repellents not only repel the mosquitoes with the sharp smell, just like plants do but also disguise the exhaled carbon dioxide and other human odors attractive for mosquitoes. There are also concentrated liquid repellents which need to be sprayed on larger territories. Repellents based on DEET, Picaridin, and oil of lemon eucalyptus (OLE), PMD, IR3535, and Permethrin are considered the most effective ones.
  • Larvicides are crucial when it comes to getting rid of mosquitoes. Use these larvae control products to break the mosquito development cycle at the larval stage in standing water, such as the larvicides containing live bacteria, see 20-Pack Mosquito Dunk.
  • Adulticides are concentrated liquid insecticides aimed at killing adult mosquitoes. Dissolve the product in accordance with the manual and spray it all over!! The best adulticides are Black Flag Liquid.
  • Mosquito traps are powerful devices which draw an insect with an attractive smell, CO2, heat or moisture. Once in the trap, mosquitoes find themselves in a closed space where they die of dehydration. The traps are harmless for humans. Indoor traps will protect you from a couple dozen mosquitoes at home, while outdoor propane traps will exterminate thousands of mosquitoes. Choose the best mosquito trap.
  • Foggers are devices which create a poisonous fog around. The fogging liquid is toxic to humans, and, that’s why you must work with foggers wearing a special suit and a protective mask. The main advantage of these devices is that you can work on large areas as fast as possible.


WAYS TO GET RID OF MOSQUITOES INDOORS

Ultrasonic Bug/Pest Repeller

Ultrasonic repellers have been around in some form for a while, but manufacturers are making them smaller, more attractive, and more affordable today.  While it is difficult to prove, the ultrasonic devices are said to emote a radio frequency that will be very unpleasant for pests like mosquitos, bugs, and mice.  The frequency is not picked up by humans or most pets, so you should not be affected by it.  Anecdotes suggest that these repellers work well in many cases, and given that they also might keep mice and ticks away, could be worth a try.  Best of all, there is no chemical be released, only radio waves.

Camphor Oil

Camphor has been found to have long-lasting effects as a repellant. All you have to do is light camphor in a room with all the doors and windows closed and leave it like this for 15 to 20 minutes (carefully supervised, of course). Your room will be mosquito free in absolutely no time, but it will have a scent that might be foul for you too.  You can also just set camphor tablets in a room and let them evaporate over time — it won’t take long.  Camphor has many other benefits too, such as being an herbal solution for muscle pain, better breathing, and sedation.

Tulsi

Tulsi has been found helpful in killing mosquito larvae and keeping mosquitoes away. In fact, the more people research Tulsi, the more we find that it is really a pretty incredible and widely-applicable herb. Simply plant a Tulsi shrub near your window, as the shrub has properties which prevent mosquitoes from entering your house.  Tulsi is an Indian herb which sometimes goes by the name “holy basil”, used for cooking in many Indian dishes.  It is also known to be useful in treating mosquito bites when applied directly to the bite area.

Dry Ice

Because the carbon dioxide we exhale attracts mosquitoes, we are quite vulnerable to them. Dry ice emits carbon dioxide, and all you have to do is place some dry ice in a container and keep that container some distance away. When you see mosquitoes attracted to the container, close the lid. Although it is a time-consuming method, it is quite effective.  Dry ice is not terribly easy to have shipped to you, so we recommend looking for it locally.

Garlic

With a strong pungent smell and mosquito larvicidal properties, garlic is one of the most efficient mosquito repellants on this list. All you have to do is crush a few garlic cloves and boil them in water for some time. Pour the water in a spray bottle and spray it around the room to prevent any mosquitoes from coming near you.  Or, if you like cooking with garlic, heat up your favorite garlic-laden dish when you notice the mosquitoes are starting to get bad.  Minced garlic is also an option to consider, which can be boiled in water as well.  You can get garlic at the grocery store, or find it here and have it shipped to your home.


Best Ways to Get Rid of Mosquitoes

Garlic Water

Citronella candles are great for repelling insects, but they can be pricey. Get the same effect for much cheaper by mixing garlic with water and spraying it near all your outdoor light bulbs. As the bulbs heat up, they’re spread a faint garlicky scent across your yard, which will keep mosquitoes and other bugs away.

Egg Cartons and Coffee Trays

Mosquitoes are a pain each summer, but you don’t have to buy citronella candles, mosquito coils, or the latest gadget—you can just use cardboard egg cartons and coffee trays (the kind you get when you order more than a couple of coffees to-go). Light them on fire, then blow them out and let them smolder in a fire-safe location. The burning smell they produce is pleasant, but keeps mosquitoes away.

Rosemary and Sage

Do mosquitoes hover over the grill when you barbecue? Next time, place a few springs of rosemary or sage on top of the coals. They’ll repel mosquitoes, leaving your meat in peace.

Peppermint

Looking for an effective, yet natural way to combat mosquitoes? Try peppermint! Combine a few drops of peppermint essential oil with one cup of water in a spray bottle, shake well, and spray onto skin. Not only will the chemical compounds in peppermint help repel the blood-sucking beasts, but you’ll also smell minty fresh!

Lemon Eucalyptus

When shopping for a natural mosquito repellent, look for one that contains oil of lemon eucalyptus. It’s extremely effective and provides long-lasting protection.


How to Get Rid of Mosquitoes

Keeping Mosquitoes Away from Your Skin

Slap them with a swatter. A mosquito swatter, usually made of a thicker metal or plastic than a regular fly swatter, is mounted on the end of a springy wire. This dramatically increases your chances of hitting a stationary mosquito by increasing the momentum of the swat.

Wear chemical mosquito repellent. Keeping mosquitoes away from your body is the best way to avoid getting bitten. Use insect repellent on uncovered skin surfaces and on your clothing when you’re outdoors, especially during the day. When using sunscreen, apply it before insect repellent.

Use an oil-based repellent. The safety of using chemical deterrents manufactured by combining synthetic chemicals in the laboratory has been questioned, and there are many natural solutions you can use instead. Citronella oil, cinnamon oil and castor oil are reputed to keep mosquitoes away. Most natural repellents require more frequent application or use than the chemical versions.

Wear loose, full coverage clothing. Long-sleeved shirts and long pants will help to protect you from mosquitoes when you’re outdoors. Covering your skin is a key approach to repelling mosquitoes.

Use mosquito nets to protect yourself at night. If you’re sleeping in a mosquito-infested area, get a mosquito net to drape around the bed or mat so that it touches the floor on all sides. This is the only really effective way to prevent them from getting inside to bite you, especially if there are open windows or doors in the vicinity.

Tips To Control Pain Management

Pain without medicines???

Introduction to pain management

Pain management can be simple or complex, depending on the cause of the pain. An example of pain that is typically less complex would be nerve root irritation from a herniated disc with pain radiating down the leg. This condition can often be alleviated with an epidural steroid injection and physical therapy. Sometimes, however, the pain does not go away. This can require a wide variety of skills and techniques to treat the pain. These skills and techniques include:Interventional procedures

  • Medication management
  • Physical therapy or chiropractic therapy
  • Psychological counseling and support
  • Acupuncture and other alternative therapies; and
  • Referral to other medical specialists

All of these skills and services are necessary because pain can involve many aspects of a person’s daily life.


Managing pain without medicines

Many non-medicine treatments are available to help you manage your pain. A combination of treatments and therapies is often more effective than just one.

Some non-medicine options include:

  • heat or cold – use ice packs immediately after an injury to reduce swelling. Heat packs are better for relieving chronic muscle or joint injuries
  • physical therapies – such as walking, stretching, strengthening or aerobic exercises may help reduce pain, keep you mobile and improve your mood. You may need to increase your exercise very slowly to avoid over-doing it
  • massage – this is better suited to soft tissue injuries and should be avoided if the pain is in the joints. There is some evidence that suggests massage may help manage pain, but it is not recommended as a long-term therapy
  • relaxation and stress management techniques – including meditation and yoga
  • cognitive behaviour therapy (CBT) – this form of therapy can help you learn to change how you think and, in turn, how you feel and behave about pain. This is a valuable strategy for learning to self-manage chronic pain
  • acupuncture – a component of traditional Chinese medicine. Acupuncture involves inserting thin needles into specific points on the skin. It aims to restore balance within the body and encourage it to heal by releasing natural pain-relieving compounds (endorphins). Some people find that acupuncture reduces the severity of their pain and enables them to maintain function. Scientific evidence for the effectiveness of acupuncture in managing pain is inconclusive
  • transcutaneous electrical nerve stimulation (TENS) therapy – minute electrical currents pass through the skin via electrodes, prompting a pain-relieving response from the body. There is not enough published evidence to support the use of TENS for the treatment of some chronic pain conditions. However, some people with chronic pain that are unresponsive to other treatments may experience a benefit.

Your doctor or other healthcare professional can guide you through the best treatments for you.


Over-the-Counter Treatments for Nerve Pain

  • Topical painkillers. Many over-the-counter creams and ointments are sold to relieve nerve pain. They include ingredients that work as a local anesthetic, numbing the pain in the area where you apply them. Some contain capsaicin, a painkiller derived from chili peppers. Others use different natural ingredients, like botanical oils. One advantage of topical treatments is that you can apply them precisely where you need relief.
  • Painkilling medicines. Some people with neuropathic pain turn to familiar over-the-counter painkillers like acetaminophen, aspirin, and ibuprofen. While these drugs might help with mild or occasional pain, they’re often not strong enough for serious nerve pain. There’s also a risk that someone with chronic pain might begin to rely on these medicines too much. So, always make sure to follow the directions on the bottle. Most painkillers should never be taken for more than 10 days. If you are still in pain and want to take them for longer than that, you need to talk with your doctor — it may be a sign that you need a different treatment.
  • Supplements and vitamins. In some cases, nerve pain can be worsened — or even caused — by a deficiency of vitamin B12. If your doctor decides you need it, he or she might recommend injections of vitamin B12 or supplements.

Other supplements are sometimes used as treatments for nerve pain. There’s some preliminary evidence that a few of them — like acetyl-L-carnitine, alpha-lipoic acid, and gamma linolenic acid — might help with nerve pain caused by diabetes. However, the evidence isn’t clear; more research needs to be done. Always check with a doctor before you start taking a supplement regularly.


10 Ways to Manage Pain without Opioids

The over-prescription of opioid painkillers such as Hydrocodone and OxyContin is one of the main causes of the current addiction epidemic in this country. According to the Centers for Disease Control (CDC), nearly 50 percent of all opioid-related overdose deaths in the US involve a prescription painkiller and almost two million people in this country abuse or are dependent on prescription opioids.

Unfortunately, people have legitimate pain issues that can lead to a substance use disorder. As many as 25 percent of people who receive prescription painkillers in a physician’s office or hospital are struggling with addiction. The CDC has recently released guidelines aimed at reducing the misuse of opioid pain medications. Here are ten ways that various experts recommend managing pain without the use of opioids.

  1. Biofeedback. Biofeedback is a treatment or exercise that allows a patient to learn to consciously control his or her heart rate and response to stimuli on a screen. It is useful for pain management because it can teach patients to bring their own pain levels under control.
  2. Chiropractic Care. Chiropractic care is now an accepted form of treatment for chronic low back pain, neck pain, and headaches. A chiropractor manipulates the spine to help the body function properly and may also order physical therapy and massage treatment.
  3. Eastern Medicine. Also referred to as Chinese medicine, this is a term that encompasses both herbal treatments as well as acupressure and acupuncture. Acupuncture, in particular, has been used for the relief of pain in the shoulder, low back, neck, and knees.
  4. Hypnosis. When patients undergo hypnosis, they receive suggestions that help them respond differently to sensations and feelings in their body. A patient can learn to use relaxation and other techniques to reduce anxiety, which can also result in lower levels of pain.
  5. Cold and Heat. Cold and heat are accepted as effective therapies against chronic pain in various parts of the body. Cold helps reduce inflammation and heat can alleviate spasms in muscles.
  6. Meditation. One method of reducing pain is incorporating various relaxation exercises into everyday life. This includes learning to breathe to lower blood pressure and practicing meditation techniques. Meditation can help reduce the “fight-or-flight” response to pain, and there are even smartphone apps that act as simple guides.
  7. Massage. Massage therapy is another effective way to provide relief from chronic pain. Most massage therapists will provide massage to the affected area as well as the whole body with the goal to relieve muscle pain as well as improve circulation.
  8. Medication. Just because you are avoiding opioid painkillers, that does not mean that you cannot take any medications for chronic pain. Among the medicines that the CDC recommends for pain relief are:
  • Analgesics such as Nonsteroidal Anti-Inflammatory Drugs (NSAIDs) and acetaminophen
  • Antidepressants
  • Topical agents
  1. TENS. A Transcutaneous Electrical Nerve Stimulation (TENS) produces electrical stimulation in the affected area, which has been shown to reduce pain related to musculoskeletal conditions.
  2. Yoga and Tai Chi. Exercise can be an excellent way to build up the muscles around damaged tissue and vertebrae. Among the best forms of exercise are those that use slow and smooth movements such as yoga and Tai Chi. These are both guided programs that also focus on breathing and relaxation techniques.


4 Ways To Manage Chronic Pain Without Medication

Four ways to manage chronic pain before taking pain medication include:

  1. Regular exercise: Exercise may be the last thing on your mind when you’re in pain. But gentle activity can actually help you recover. Exercise in the form of walking, biking or swimming loosens stiff muscles and improves blood flow, both of which speed your body’s natural healing process.
  2. Integrative medicine techniques: These techniques – which include yoga, tai chi and acupuncture – tap into the mind-body connection. “There is growing evidence that shows that the connection between the mind and body is greater than previously appreciated,” Zador says. Integrative techniques combine the power of breath, movement and mindfulness (the practice of being present in the moment) to relieve pain by calming unhealthy activity in the mind.
  3. Stress management: There is a strong connection in the brain between stress and pain. Finding healthy ways to cope with the pressures of everyday life can help you gain peace of mind and control of your symptoms.
  4. Physical therapy: Stretching and strengthening muscles with the help of a physical therapist not only relieves pain, but can prevent it from coming back. Physical therapy can also improve overall muscle functioning, which reduces strain and risk of injury in the long run.

There are a variety of benefits to overcoming chronic pain without medication. For starters, many people enjoy not having to remember to take pills several times a day. Other benefits include avoiding unpleasant side effects that may come with the medication, such as:

  • Drowsiness
  • Upset stomach
  • Hormone imbalances that can lead to problems like weight gain
  • Increased risk of organ damage, including kidney problems

The treatment options that are best for you depend on several factors, including the type of pain you are experiencing and what caused it. In some cases, especially when non-medication treatments aren’t successful, medication is the best option. But it’s often possible to get relief without medication and avoid unpleasant side effects.

“When medications are appropriate, we consider each patient’s lifestyle, overall health and personal preferences toward medication and pain procedures. This combination of factors helps us prescribe the treatments that are likely to help patients achieve long-term relief while avoiding side effects,” Zador says.

If chronic pain has become part of your daily life, learn more about the pain treatments available by talking with a provider specializing in pain management.

Use Wedding Dj To Make Your Wedding Full Of Music

How to Choose a Wedding DJ

Personality

If we could only give you one tip, it would be this!

Your DJ is going to be responsible for setting the tone of the evening. If you have a boring DJ…that means a boring wedding.

Communication

You’ve probably been hearing how important communication is during all those premarital classes. Well, working a DJ is no different.

Playing music is only part of what a DJ does. The other half is talking. From making sure you’re on the same page regarding the “do not play” list to making sure the photographer captures the cake cutting, wedding DJs need to communicate and they need to do it well.

Flexibility

Any DJ who specializes in weddings will end up working a lot of them, so they need to be organized. But when those plans go awry, they also need to be flexible.

An organized DJ has a copy of the evening’s timeline so they can keep events on track. But if the bride and groom are an hour late, they should be able to adapt on the fly so that you and your guests are able to enjoy the evening without feeling rushed (with plenty of time for dancing).


TIPS FOR CHOOSING YOUR WEDDING DJ

KNOW THAT YOU GET WHAT YOU PAY FOR

When you start talking about wedding DJ budget, you also have to talk about value. People will invest only where they see a direct value. Be wary of national websites that create wedding budgets. Since those websites that do things on “average,” they are good for couples looking for an average experience. You deserve more! Because entertainment is a service-based business, it is not a product-based business. This means that wedding entertainment professionals are singular – there’s only one Jason Jani. In addition, there’s only one Denny Testa. Your wedding DJ cost will correspond to the experience and professionalism of that DJ.

BOOK OPEN FORMAT STYLE

What is an open format wedding DJ? Open format entertainment mashes different genres of music together, so that wedding guests of all ages can enjoy themselves at your wedding reception. An open format DJ may play Jackson 5, then NSYNC, then Usher, then The Chainsmokers. It’s a DJ’s job to create a unique experience so everyone at your NJ wedding or NY wedding enjoys themselves. Bad song requests can kill your dance floor – an open format DJ ensures that doesn’t happen as they read the crowd. Good songs can inspire and create emotion – music has the power to bring people together and escape from life’s stresses. This is why song selection and timing matters. Therefore, the right open format DJ will spin live and keep the party

FEEL THE VIBES

Chemistry is a big part of choosing a wedding vendor. Your wedding is probably the biggest and also most expensive event you’re ever going to throw, so you should meet with your wedding entertainer prior to your big day. This will relieve stress and ensure you’re making the right choice for you. Start with Googling the person/company and reading their reviews. Watch any videos they may have from other weddings. If you can tell that you like their style, schedule a meeting with that wedding DJ to make sure you vibe with each other in person. Then seal the deal!

PEEP THE GEAR

DJ Jason Jani incorporates DJ gear into your wedding reception that subtly enhances the atmosphere. Special lighting, screens, as well as equipment that looks like strategically placed furniture rather than a bulky DJ booth make your wedding reception look expertly designed and clean. The right entertainment gear adds ambiance to your wedding reception instead of taking away from it. Ask your wedding DJ what gear he/she brings along and how it looks in a ballroom, backyard, or wherever your wedding reception is taking place!

SHARE WHAT YOU LIKE

Your wedding is your wedding – not a replica of what other people have experienced. As a result, detail with your wedding DJ what is important to you. Some couples may have specific songs lists of what they want to be played. Other brides and grooms may give their wedding entertainer complete freedom to play what they feel is right to keep guests on the dance floor. Love Beyonce? More of an 80s fan? No matter what your style is, make sure you communicate your wants and needs, so your wedding DJ is on the same page.


Tips for Choosing a Professional Wedding DJ Company

Personality or Party:

One concern for a couple getting married comes down to the music that will be played at their wedding. Some new DJ’s are trying to emulate the club DJ’s. They want to be the personality at the show. And that is part of the issue – it is about them and their show. They have experience playing the new music but often lack the knowledge or experience playing a broader range of music. When you have guests ranging in age from young nephews and nieces to your aunts, uncles and grandparents, you need a DJ who can play music for people of all ages.

That’s why it is important to select an experienced wedding DJ service that are experts at getting people dancing and partying. You want DJ’s who are also familiar with the traditions of a wedding. From the ceremony, grand entrance to the important dances and the throwing of the bouquet, the DJ’s from Quality Entertainment have the right type of experience – and that’s wedding experience.

Ethical business practices

When it comes to choosing your DJ company, please check that they have the right type of insurance and licenses. Check with your wedding venue as some insist that the DJ’s have a certain level of liability insurance. Some DJ’s have skipped the step to safeguard your wedding. In addition, they may have side-stepped the legal procurement of music. They bought a laptop and downloaded music but they haven’t paid the license fees that allows them to be DJ’s in Ontario.

For example, Quality Entertainment is a proud member of the Canadian Disc Jockey Association and as part of its membership, they are fully licensed by the AVLA and completely insured for your protection. They are also licensed for business in Ontario.

Emergency Back up

It is the ultimate fear at a wedding – that a vendor doesn’t show up or a piece of equipment fails. When choosing a DJ company ask them about their emergency back up plans. Do they have back up DJs that can be called if yours becomes ill? Do they have equipment standing by in case something fails? This can give you a sense of their organization and how professionally set up they are. Quality Entertainment has you covered on both points

When you choose a DJ company for your wedding music don’t trust one that hasn’t taken the steps to be a professional company. Trust the company that has been doing it for 17 years – Quality Entertainment.


How to choose the right DJ for your wedding party

Professionalism and personality

Any form of contact with a wedding DJ should speak volumes. Danny advises that during any correspondence, be it in person or over the phone, you can get a feel for whether the DJ is a good business person, has a can-do attitude and is someone you can get along with… key qualities which suggest a superior service for your special day.

Awards

An award win can be the deciding factor when torn between any two wedding suppliers. Some awards may be more valuable than others, but always research the authenticity of any award titles or accreditations stated. Mainstream industry awards are often a winner.

Reviews

Online reviews made by other couples will tell you all you need to know about whether a wedding DJ is good or great and will provide a professional and reliable DJ service. Browse the DJ’s website and social media; if the DJ has been given exceptional reviews, they’ll certainly want to share them.

Look further than five-star reviews, as Danny advises: “A five star-review is one thing, but read the content. This will really give you a better flavour for the company through the eyes of their clients.”

Recommendations

Danny says: “DJ2K is recommended by a number of top wedding venues in the UK. It is always worth considering a venue’s recommended suppliers and having a chat in the first instance. However, if your chosen supplier isn’t recommended or hasn’t worked at your venue before, don’t worry – they have the potential to bring a fresh approach to proceedings.”


Most Important Tips For Finding The Best Wedding DJ

Know what you should wait for, and know what you shouldn’t.

Uplighting gets cheaper every year. There’s a new style photo booth coming out each month. The point is, no one is going to run out of a commodity like lighting or photo favors for your wedding date. However, great wedding DJs get booked up far in advance because they have a high demand. With only 52 weekends a year to perform from the 100s of requests they get each year, make sure you don’t wait too long to secure a DJ. Unless you don’t want the best, which in case you should wait as long as you’d like.

Beware of the all-in-one.

Generally, any company that provides a lot of multiple services such photography, videography, entertainment, decorations, etc. in one package is  not great at any of those things, or only great at one of those things. Your DJ should be able to provide you with music for your ceremony & cocktail hour, and also lighting and sound for your reception. But beyond that, you’re not going to find the best of anything all from one single vendor.

Hire a two person wedding DJ team.

The best wedding DJs consist of a two person team, an emcee and a DJ. It’s practically impossible for one person to play music and run your wedding reception at the same time. Formalities can be announced from behind the turntables, but don’t be surprised if the solo DJ talent that you hired to focus on the music for the reception is a little overwhelmed by the additional demands that come from performing for a wedding (as opposed to a nightlife event). A two person team will make formalities smoother, allow the emcee to check in where needed, and much more. In addition, some venues that host multiple weddings on the same day only allow for a small window of time for your vendors to setup. If this is the case, hiring a two person team is going to ensure that they are setup in time. You should have a great DJ focused on the music at all times, and a great emcee to focus on the rest of the party.

Use The Best Electronic Leak Detection

How to Choose a Leak Detector

It is essential that you choose the best refrigerant leak detector that suits your requirements. But what are the qualities that you should look for before selecting a product? Let’s find out:

Works Fast

A device that works fast is considered the best leak detector as it allows you to reach different locations to check on leaks quickly. You should look for detectors with little warm-up time, quality sensors, and instantaneous time response.

Detects a Wide Variety of Refrigerants

Although you may not need a leak detector capable of detecting all types of refrigerant make sure that the one you choose is capable of detecting the refrigerant you are going to be working with. Devices that detect a variety of refrigerants are usually expensive, therefore apply your expertise and check your field applications before picking the right one.


How to Choose and Why Use Leak Detectors?

Refrigerant leak detection

The chart below shows the most common groups of refrigerants we use. With the wide variety of refrigerants now available we have to ensure that the type of leak detector we are using is both suitable and SAFE to use with the refrigerant in the system. Most electronic leak detectors are suitable for CFC, HCFC and HFC’s. Caution should be taken to use suitable electronic leak detectors with HC’s which are flammable. We must not forget soapy water as a very effective leak detector. Many people discount it, but for finding leaks it is possibly the most effective method and lots of people have certainly used it to successfully find some very small leaks.

Leak Detector Maintenance

Having selected the appropriate leak detector for the job it is important to be sure the equipment is working. Most of the electronic leak detectors need regular calibration and the corona discharge and heated diode types require sensor changes at regular intervals. Read the manufacturers instructions as a leak detector that is not working is not obvious to the user. DO NOT open a bottle of refrigerant over your detector head to prove that it is working – even a sensor that is spent will sense that, come to that so would you!


How To Choose A Leak Testing Method That’s Best For Your Needs

Choosing the right method

Several factors need to be considered when it comes to choosing a leak detection method.

The first question to ask is what are the tightness criteria that need to be detected?  Highly sensitive helium leak detection is the best way of detecting leak tightness in the range of 1 x 1–7 mbar*l/s or lower, but if your required leak rate is above this value, then there are numerous other possibilities.

Another question to ask is how important are cycle/throughput times?  If your application involves testing of 100% of components or parts in a production line, then speed is an important consideration.  If your leak testing challenge is limited to sample testing and laboratory applications, then throughput times aren’t such a critical factor in your choice of leak testing technology.

The design of the part under test – and specifically the design of the seals – should also be considered.  Leak testing often involves pressurising a part to its maximum operating pressure, and some seals will perform better under higher pressure and vacuum than others.


Best Methods for Refrigerant Leak Detection

Ultrasonic

Uses sound amplification.  Acts on the high frequency sound pitch that occurs when gas passes through an orifice.  This method may not be accurate on small leaks because not enough sound is generated through a small orifice.

Corona Discharge

Air is pulled through an energized electrical field around an electrode.  Refrigerant gases are broken down by the electric arc (corona discharge) and detected by the sensor.  The presence of a detectable gas changes the current flow in the electrode and triggers an alarm.  Gases other than refrigerant can trigger an alarm, giving the appearance of a leak when there may not be one (false alarm).  The sensor may degrade over time and need to be replaced.  It should be checked regularly against a calibrated reference leak to ensure correct operation.  Do not use in the presence of combustible gases.

Heated Diode

Air is pulled over a heated diode.  Halogenated gases are broken down by the heater resulting in a change in current flow through the diode.  The change in current through the diode triggers an alarm.  The heated diode sensor is sensitive to excess refrigerant in addition to other contaminates such as moisture and oil resulting in sensor degradation.  Because of sensor degradation, the heated diode sensor must be checked regularly for accuracy and replaced within 100 hours of use.  When exposed to contamination including excess refrigerant, the sensor could fail much more quickly.  For this reason, sensors must be checked regularly against a calibrated reference leak to ensure correct operation.  Do not use in the presence of combustible gases.

Heated Electrolyte

Air is pulled over a heater that is in the presence of an electrolytic material that reacts with the broken down halogenated refrigerant gasses.  Halogenated gases result in a change in current flow between the heater electrode and the electrolyte which triggers an alarm.  Like the heated diode sensor, the electrolytic sensor is sensitive to excess refrigerant and other contaminants resulting in sensor degradation.  Excess refrigerant exposure can have a quick impact on sensor life.  A heated electrolyte detector must be checked regularly with a calibrated reference leak to ensure that it can accurately detect a refrigerant leak.  Do not use in the presence of combustible gases.

Infrared

Air is pulled through an optical window in the infrared sensor.  Refrigerant gases absorb IR Radiation.  The optical sensor senses this and triggers an alarm, depending on how much IR has been absorbed.  This technology is very accurate and has been the technology of choice in lab settings for many years.  It has only recently (last 5 years approx.) been introduced to the field in the form of portable hand held leak detectors.  The refrigerant isn’t broken down by heat and doesn’t directly contact the sensor, thus the sensor isn’t subject to contamination.  Sensor life expectancy is over 1000 hours or the life of the leak detector.  To ensure accuracy, the infrared detector should be checked regularly against a calibrated reference leak.


Refrigerant Leak Detection Methods

How to Find a Refrigerant Leak

As an HVAC professional, you have a business responsibility to find and fix refrigerant leaks through preventative and corrective maintenance. In addition, various regulatory jurisdictions at the local, state, and federal levels (e.g., EPA 608) require regular leak inspections.

These requirements to find refrigerant leaks can be successfully met by employing the best refrigerant leak detection method(s) for your job needs. Refrigerant leak detection methods include, but are not limited to:

soap bubble method;

fluorescent dye method; or

electronic leak detection method.

As you can see, there are numerous methods that you can use; each with their own benefits, and this is where you need to pay close attention. That’s why we are going to start by looking at the more traditional methods and then move to the newer methods. By the end, you will find out which methods are best.

Soap Bubble Method

The soap bubble method is a mainstay that has been relied upon by residential technicians for decades. It’s fairly self-explanatory. In essence, you apply soapy water or a leak detection spray to see if there are leaks at certain points. Bubbles should appear at leakage points.

While common and trusted, what undermines the soap bubbles method is the fact that it can be difficult to pinpoint leaks under certain conditions, such as if the leak is very small or if it is windy outdoors. That’s why it may be most beneficial for you to use the soap bubble method in combination with another method, particularly with one of the electronic leak detection methods.

Do Electrical Upgrades For Better Home

5 ELECTRICAL UPGRADES YOU’LL WANT FOR YOUR HOME

Updating your home can be fun, but you’ll also want to consider some electrical upgrades. Whether it’s the kitchen, bathroom, or basement you are planning to remodel, consider every electrical component of the house first. Do you need more outlets? Are the light switches and fixtures modern? Do you need a ceiling fan installed? Is it time to upgrade the breaker box panel?

Many homeowners don’t think about the electrical system until it doesn’t perform like it should. As they tackle remodeling, they find out later that they needed some electrical upgrades that they still want but didn’t consider. So before you make the first step in a home makeover, consider the electrical system first and plan for it in the budget. Here are some electrical upgrades you might be interested in.

Smart Home Features

If you would like to make your home life easier, installing different smart systems throughout the house is a great project. You can have everything automated and controlled remotely if you so prefer. Here are a few smart electrical upgrades you’ll want to consider:

  • Remote controlled sprinkler system
  • Remote controlled heating & cooling
  • Remote security & video surveillance system
  • Smart thermostats
  • Smart alarms, sensors, and sirens
  • Remote controlled lights
  • Smart Hubs
  • Smart smoke alarms
  • Grocery ordering refrigerators
  • Remote controlled drapes or blinds

Panel Upgrades

Today’s modern technology requires much more power than the older models. Although many manufacturers boast of energy efficiency, by comparison, they still utilize more energy. This is because of larger and more feature-packed washers and dryers, refrigerators, microwaves, dishwashers, and media-driven electronics and gadgets. Overall, the average household is using 30%-50% more energy than ever before. When remodeling any room in your home, consider how much energy it will utilize and whether or not your electrical system can handle it in a manner that is safe and efficient.

Outlet and Receptacle Considerations

Receptacles and are like any other part of your electrical system. When installed, they must be safe and efficient. You may love the way a certain receptacle looks on your wall. The real question, however, is will it perform the way it’s supposed to. You’ve noticed that high-energy appliances use different receptacles, such as a specialized model for your washer or dryer. The reason for this is that these appliances require large amounts of power and need a certain type of receptacle that can accommodate it. When remodeling, get advice from a professional electrician in order to get the right outlets and light switches for the electronics and appliances in your room. There are several options and many of them come with great decorative features that put the finishing touches on your room.

Modern Light Switch Features

When it comes to creating the right room atmosphere, lighting is everything. The right light can create energy or give you a soothing environment. Although the right type of light is important, light switches control them. So be sure you install a modern switch that makes controlling the lights easy. For instance, dimmer switches are very popular they allow just the right amount of light. There are many other options including 3-way, 4-way, sliders, different size switches, multi-locations, dimmers, and even remote control lighting. With all the options available, you never have to settle for boring light switches again!

Rewiring & Rerouting

Most room renovations include moving things around. For instance, you may re-conceptualize your entire kitchen and want the counter transferred to the other side of the room. While this may be a more aesthetically pleasing approach, your current electrical system may not be in a position to accommodate the move. Before you know it, you have to pull the counters back off the wall and make the adjustment. So make sure that there are actually wires behind the wall before you move your kitchen components, appliances, or electronics.


How to Update your Electrical System?

  • The first step is to upgrade your panel by bringing more power from the utility to your home. You can replace the existing meter and circuit breakers to allow it to handle more power or replace an electrical panel or circuit breakers that are obsolete, damaged or dangerous. Doing this enables your electrical system to have more power to distribute without affecting the wiring inside the home.
  • The second step includes adding extra circuits that can distribute the power to your rooms and appliances.
  • Updating the system may also include adding new electrical outlets and replacing the used cable, old cable wires and receptacles.

What Risks does a Malfunctioning Electrical System Pose

There are a number of reasons why malfunctioning, old or faulty wiring represents a huge problem for a few reasons. Some of them include:

  • An old electrical system creates a fire hazard, putting you and your loved ones at risk. One of the biggest causes of house fires is bad wiring. When the wiring becomes exposed or heated or when sparks are created, materials around it get ignited which eventually leads to a big fire.
  • The risk of electrocution increases. If the wiring gets old and there are signs of wear and tear, then the electrical current won’t be transferred properly. The insulation may have holes in them. In both these cases, there will be a serious risk of electrocution.
  • The lifespan of your electrical appliances will be cut down significantly as the faulty wiring won’t be able to manage the power in a safe manner, as it once did, and it may short your appliances. Further, the faulty wiring and electrical system may not have the capacity to support modern appliances which will cause your washing machines, dishwashers and microwaves to wear out quickly.

The overall efficiency of your home’s energy will be drastically reduced. This will also show up in your electric bills apart from the appliances getting ruined.

Signs that you Need to Update your Electrical Panel

If you observe any one of the following signs, then it is time to get your electric system updated:

  • Breakers tripping frequently
  • Fuses blowing repeatedly
  • Constant flickering or dimming of lights
  • A tingling sensation whenever you touch any electric appliance
  • Warm, discolored or sparking outlets
  • A persistent burning smell from a room or appliance
  • Two-prong ungrounded outlets throughout the house
  • No Ground Fault Circuit Interrupter (GFCI) outlets in various rooms and areas exposed to moisture e.g. kitchens and baths.


Can Homeowners Legally Do Electrical Work on Their Own Houses?

Performing even minor electrical work on a home brings with it a series of risks, both to the worker and the people who’ll eventually inhabit the house, so states and local governments produce and enforce building codes that promote safety. In many cases homeowners can perform their own electrical work without the help of a trained professional, as long as the work complies with local codes.

Allowable Actions

Some forms of electrical work fall outside of any state or local regulation. In general, homeowners can perform only the most basic repairs on their own, without any form of license or permit. This includes tasks such as replacing a light switch, outlet cover or lighting fixture. It also includes replacing a fuse box, but only when the replacement box is the same type and size as the previous box. Most other electrical work requires a permit.

Permits

Electrical permits ensure that homeowners who perform their own electrical work–or hire contractors to perform it–comply with local building safety codes. Homeowners can apply for permits to perform their own electrical work. Some local governments–such as the city of Boise, for example–only issue electrical permits to homeowners who don’t plan to sell their homes within a year. Homeowners also must supply proof of ownership and identification to receive electrical permits that allow them to make repairs or expand a home’s electrical system.

Licenses

Electrician licenses allow trained professionals to perform electrical work and charge for their services. Homeowners who plan to sell their homes in the near future, or who perform work on homes other than their primary residence, must either hire licensed electricians or become licensed themselves. Licensed electricians still must apply for and receive the same permits as homeowners who do their own work.

Penalties

Homeowners who perform unauthorized electrical work on their homes without the appropriate permits, or who perform work on others’ homes without a license, face stiff criminal penalties. In New York, for example, false representation or violation of the state electrical work code is a misdemeanor. Fines range from $500 for a first offense to as much as $5,000 for a third offense, as of 2011. A third offense also carries the possibility of up to six months in jail, in addition to a fine.


Powerful Electrical Upgrades

With the large amount of electrical equipment found in the modern home, it’s no wonder that electrical upgrades are becoming more common. Handling the electrical needs of today’s homeowner is no small task, and to keep everything running smoothly, new electrical wiring is often a necessity, especially in homes built many decades ago. If you are considering an electrical upgrade for your home, there are a few things you should be aware of; an electrical wiring project is no small task, and the more you know about what’s available, the better you’ll be able to communicate to your contractor what you expect from the job and how much it will cost.

Planning an Electrical Wiring Project

A large electrical wiring project adds a considerable load to your main electrical service. In about 25 percent of all homes, some type of service upgrade is needed before new wiring can be installed. For example, many homeowners will need to replace an older 60-amp electrical service with a new service rated for 100 amps or more. A licensed electrician is needed for a job like this.

Careful planning of a wiring project ensures that you will have plenty of power for present and future needs. Whether you are adding circuits in a room addition, wiring a remodeled kitchen, or adding an outdoor circuit, consider all possible ways the space might be used, and plan for enough electrical service to meet peak needs. One of the worst things you can do as a homeowner is to spring for an electrical upgrade that doesn’t upgrade enough. With technology getting bigger and better, it’s important to make sure that your electrical wiring isn’t simply good enough for now, but good enough for whatever may come in the future.

Electrical Upgrades for Your Circuit Breaker

Electrical wiring is not a job for most homeowners to tackle themselves, but it is a good idea to know a little about what will be required to bring your house up to speed when talking with your contractor.

One way to plan a new wiring project is to look in your main circuit breaker. Though some homeowners might be intimidated by their circuit breaker, most should easily be able to find the size of the service, and read the amp rating printed on it. In most cases, 100-amp service provides enough power to handle most loads. A service rated for 60-amps or less may need to be upgraded.

Look for open circuit breaker slots in the main circuit breaker panel. You will need one open slot for each 120-volt circuit that you may plan to install, and two slots for each 240-volt circuit. If your main circuit-breaker panel has no open breaker slots, you will need to have a sub panel installed.

Electrical Inspectors

Remember, all electrical wiring work requires review by your local electrical inspector to make sure the changes conform to local electrical and building codes. Failure to have proper permits and inspections can cause problems that can cost far more time and money than some homeowners (or unscrupulous contractors) may think they can save by doing work “under the table.” You could have trouble reselling your home in the future, or worse, your homeowners insurance could refuse to cover your loss in a house fire because the house was altered illegally!


Some New Ideas For Kitchen Electrical Upgrades

Whether you are building a house from scratch or remodeling your home, here are some ideas you can ask your Art Plumbing, AC & Electric qualified electrician to include in the kitchen. After a consultation with you, he will be able to provide you with an electrical wiring plan that considers appliances which will move from place to place or remain stationary, specialized flexible connections needed for stoves or built-in ovens, and light placement for optimum visibility.

Pop Up Electrical Outlets

If you don’t like clutter on your kitchen counter, then a pop-up electrical outlet is for you. This outlet with several plug-ins, pops up from under the counter and can be pushed down again when not in use. When placed with cabinets under the counter, it is totally hidden from sight when not in use.

Invisible Outlets

Electrical outlets recessed about half an inch into the wall, allow you to push the electrical appliance right up against the wall. This in turn not only gives you more counter space but the unsightly plugs and cords remain hidden.

Upgraded Lighting

There are many new and exciting kitchen lighting options. Under counter LED lighting can now be connected to a control unit that allows the light to change colors and create different moods. Accent lighting can be placed in different areas of the kitchen creating an illusion of space. Display cupboards with glass doors can also be fitted with spotlights to attractively display the contents inside. Consult your kitchen lighting expert to advise you on the various exciting options available.

Ground Fault Circuit Interrupter (GFCI) Plugs

This upgrade was made compulsory in 2014 in all newly built or remodeled homes. This plug monitors the flow of electricity and trips the circuit, cutting electrical flow, if it senses any electrical fault. This has greatly assisted in the prevention of electrical fires and electrical shocks.

Designer Switches

You no longer only have the choice of black or white plastic switches. You now have many color and material options for your switches and switch plates ranging from stainless steel to stone. You can now customize your kitchen switches to your taste.

Data Ports

Data ports with USB wiring enable you to plug in and charge your phone and other devices in the kitchen. Once considered a luxury, most home owners are now requesting this electrical upgrade in their kitchen for obvious reasons.

Dimmers

Whether you have a headache and don’t like bright lights, or simply want to create a romantic atmosphere, a bulb parable with a dimmer switch is a nice addition to your kitchen lighting. Say goodbye to the harsh, often unattractive fluorescent light that used to come standard in all our kitchens and welcome the new, customized version you have chosen.

Induction Stoves

An upgrade from your normal gas or electric stove, induction stove plates precisely heat up only the bottom of the pot while the rest of the stove surface remains cool. Using electromagnetic technology these stoves not only heat faster and are safer but save you money as no heat is wasted.

Designer Cooker Hoods

Cooker hoods have evolved from an unsightly kitchen necessity to a custom designed kitchen appliance. You can now decide if you want your cooker hood to be a feature or to blend to its surroundings.

All electrical upgrades and installations must only be carried out by a qualified, certified electrician. Not only will we know and follow all the safety regulations, but we will also be able to professionally advise you on the correct placement of lighting, plugs and switches. A professional knows what’s new and exciting on the market and can assist you to customize your kitchen electric requirements to suit your family’s lifestyle and taste.

Move Out Cleaning In Apartment

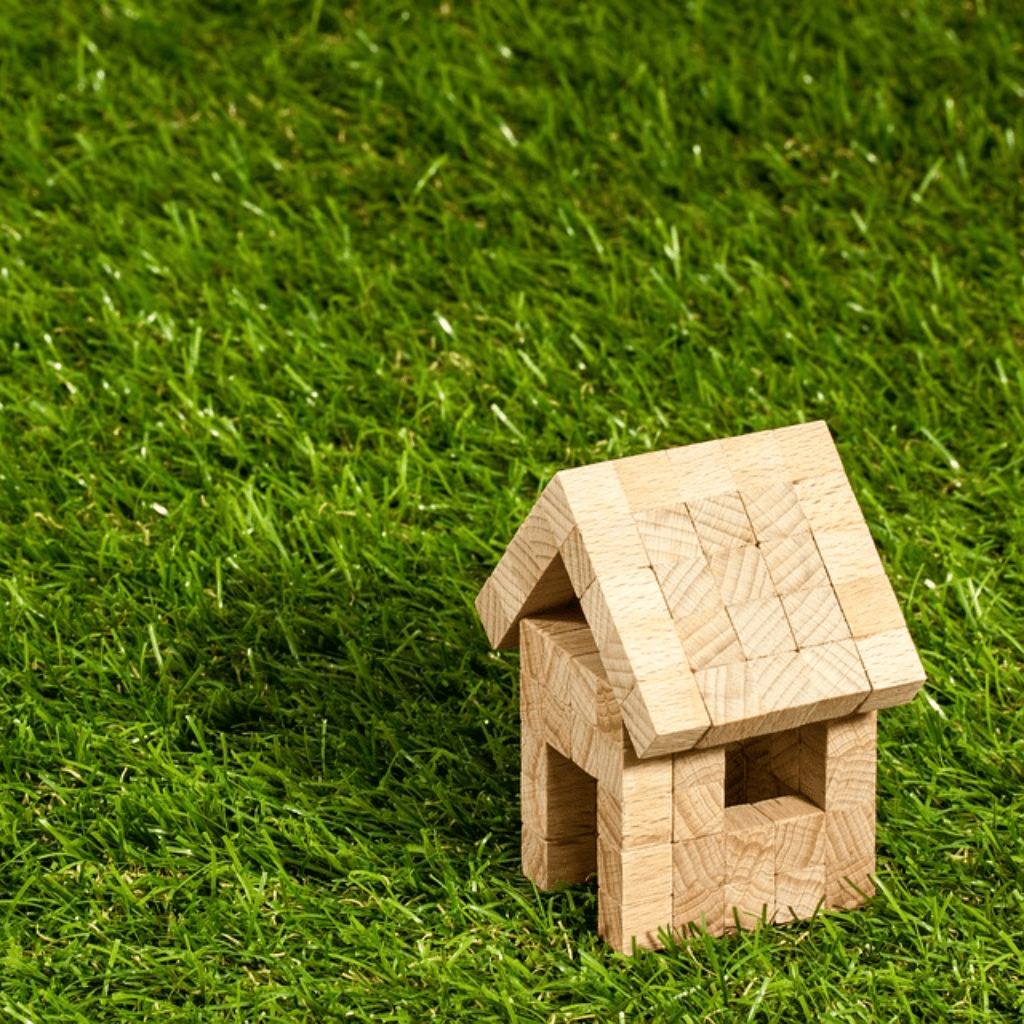
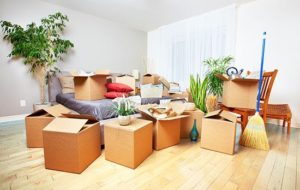
The Ultimate Moving House Cleaning Checklist

If moving house tops the list of stressful experiences people go through in life and cleaning house tops the list of loathsome experiences people face on a daily basis, then cleaning for moving should be a truly nightmarish experience indeed. The mere idea of scrubbing floors and washing windows after the long weeks of laborious moving preparations and exhausting moving tasks may be enough to put you in panic – after all, you have only just finished organizing the myriad details of the relocation process, putting all the required paperwork in order and packing all your earthly possessions, so you are highly unlikely to have any energy left to spare. And yet, you need to clean not one but two properties at the very climax of your relocation endeavor – move-out/move-in day:

1) you will want to leave your old home in top-notch condition in order to be able to get your security deposit back or to make your property more desirable for potential buyers;

2) you will want your new home to be spotless when moving in.

So, no matter how tired and how impatient to close the relocation chapter of your life you may be, you need to take the time and the effort to clean your old property before moving out and your new one before moving in. Luckily, the task may not be as difficult as it seems at first – especially if you follow our simple, yet highly efficient cleaning tips for moving house.

Moving Out Cleaning Tips

To make cleaning easier and more effective, you are recommended to:

• Get hold of appropriate moving cleaning supplies and keep them at hand. There are certain cleaning supplies you can’t do without when preparing your home for moving – disinfecting cleaners, glass cleaners, baking soda, white vinegar, cleaning cloths, dusting cloths, plastic or nylon bristled soft scrubbers, different kinds of brushes, furniture polish, fabric protectors, a mop, a vacuum cleaner, a broom and a dustpan, a bucket, a step stool, rubber gloves, etc. Make sure these items don’t get accidentally loaded on the moving truck with the rest of your possessions – you’re going to need them when the movers depart from your old home and then again, before they arrive in your new property;

• Prepare and clean the items you are going to take with you as early as possible. You will certainly want to give your household items a good cleaning after the move, but this doesn’t make cleaning them before the move redundant – you probably don’t want to take all the accumulated dust and dirt, stains and grime, bacteria and germs to your new home, do you? Besides, wiping your items clean before the move will make your job much easier afterwards, when unpacking and arranging your new place. So, make sure you empty and clean all the furniture pieces and household appliances you intend to relocate several days before moving day and get them properly packed and ready for shipment by the time your movers arrive;

• Wait until your possessions have been loaded onto the moving truck to give your old home a final, thorough cleaning. If you start cleaning while your packed possessions are still scattered all around the place, your task will turn out to be much more difficult and time-consuming than necessary – all those moving boxes and furniture pieces will be in your way and you won’t be able to clean the premises quickly and efficiently enough;

• For best results, always start cleaning from top to bottom and back to front. Otherwise, you may soil an already cleaned surface and have to wipe it again;

• Complete “dry” cleaning tasks first (such as dusting, vacuuming and sweeping). You just can’t efficiently wash, mop, and/or wipe surfaces with a damp cloth when there is still dust or dirt on them;

• Clean task-by-task, not room-by-room. This method is much faster and considerably more efficient – when you have equipped yourself with a furniture polish and a soft cloth, for example, it makes sense to take care of all the furniture pieces in the property, not just the ones in your bedroom, right?


What Are the Housecleaning Expectations When a Seller Moves?

Do sellers have to clean the house?

Sellers have a responsibility to clean the home after they move. The question becomes: how clean is clean enough? It can depend on numerous factors, and exactly who is selling the house is usually key among them.

Filth and mold are often the least of your worries when you purchase a bank-owned home. Appliances might be ripped out and maybe the water heater has been stolen. Some banks don’t clean anything. They sell foreclosed properties in “as is” condition.

But homes in a seller’s possession are different. It doesn’t matter if it’s a short sale or a regular sale.

Do Sellers Have to Clean the House?

Real estate purchase contracts often stipulate that the house is to be “broom clean.” This is generally accepted to mean that the seller should at least sweep the floor and leave the walls and ceiling bare. The language in some of these contracts is admittedly ambiguous, however, and some states are vaguer than others.

For example, standard California real estate contracts don’t address the condition of the home at all except for stating that it should be left in essentially the same condition as it was when the offer was accepted. The property is sold in its physical condition as of the date of acceptance, and the seller is to remove all personal property and debris.

Read your purchase contract to determine the extent of any cleaning you’re contractually bound to do upon vacating. Hopefully, it will be concise and not leave the issue open to interpretation.

Customary Ways to Leave a Home

Most sellers take special steps on their own to present the home in acceptable condition if there’s no legal requirement to clean the property before moving out. Yet it’s understandable that sellers might be too tired to spend a lot of time cleaning after moving all day.

Most buyers will clean the home to their own standards before moving in regardless of the sellers’ efforts. There are nonetheless a few things a seller can do to leave the house reasonably clean and to create goodwill.

You’ll want to remove all personal property—including items that you’re just going to throw out—and vacuum and sweep the floors. Clean the kitchen appliances, the insides of the refrigerator and oven, and wipe down the counters. Scour the sinks and tubs. Wipe down interior cabinets and shelves. Wash all tile and vinyl or linoleum flooring.

What About the Garage?

The garage should be clean, too, because you’re selling it as part of your home. Of course, you’ll remove all your personal belongings here, too, and take care to throw trash away as well. Sweep the floor. Above all, properly dispose of any toxic chemicals.

Items pertaining to the property such as paint cans, roofing materials, or extra flooring should be stacked neatly, but check first to make sure the buyer wants your leftover materials. Some won’t.

Start As Early As Possible

This falls into the category of being kind to yourself. Give yourself ample time so you don’t feel frantic and pressured. Moving day is going to be crazy enough, so get as much of a head start on cleaning as possible. You might even want to give the place a good, thorough scrubbing before you list it for sale. It can only help the place show better.

It can be an overwhelming challenge if you have a large home. Consider tackling one room at a time, maybe one each weekend. You’ll get there eventually, and moving day will be a cinch if you can keep up with each room after it’s spotless.


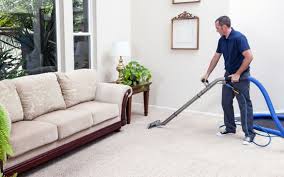
How to Clean Kitchen an Apartment Before Moving Out

Moving out of an apartment can be a hard task: finding a new place, arranging transportation, and packing up all your belongings is hard work when all you want to do is get settled in your new home. Making sure your apartment is clean might be one of the most important tasks of all, because a thoroughly-cleaned apartment means you’ll get your security deposit back. Go through your apartment room by room and clean every small space and appliance to ensure a smooth move and a full deposit returned.

Cleaning the Kitchen

1. Clean the oven and stove. Buy one or two cans of oven sprayable cleaner and read the safety directions carefully, as many oven cleaners require protective equipment (gloves & goggles) and strong ventilation. Place newspaper in front of the oven, slightly underneath the door or drawer, to protect your floor from dripping cleaner. Evenly apply both cans to the inside of the oven, the grates, and the broiler sheets.

• If you want to avoid the chemicals in oven cleaners, use a dilution of 100g baking soda in 1 liter (0.3 US gal) of water and spray onto the surfaces. For a dirtier oven, increase the amount of baking soda so that the solution is more of a paste than a liquid. Leave for one hour, then use an ice scraper to remove the burnt carbon and spray any remaining in the oven. Repeat the process until the oven is completely clean.

• Make sure the oven is turned off before starting to clean.

2. Clean up the stove. Use an abrasive cleaner and tough sponge to scrub at any spots on the stovetop. For stubborn spots, spray some oven cleaner and let it sit. Clean the vent above the stove and be certain that the light bulb in the overhead hood is in working condition. Using a sponge and paper towels, wipe down all surfaces. Rinse with clean water.

• Soak drip pans and other removable parts in hot water with dish soap for at least 30 minutes, then scrub them. Repeat as necessary.

• Make sure the gas and stove are turned off before you start to clean.

3. Disinfect the dishwasher. Pull out the bottom rack and clear out the drain area. Empty the dishwasher, then fill a dishwasher-safe cup with vinegar, place it on the top rack and run a cycle with the hottest water setting. This will sanitize and wash away grime in the dishwasher, as well as remove any odors.

• When the cycle finishes, remove the cup and sprinkle baking soda around the bottom of the dishwasher. Run through another short cycle on the hottest water setting. This will remove any remaining stains and odors.

4. Use a rag and cleaning spray to clean drawers and counter surfaces. Unplug and remove all appliances and items left in the drawers. Make sure to get into the corners of drawers and countertops.

5. Wash out the sink. Use a gentle soap, soft cloth and warm water on the faucets, drain and outer rim. Run hot water down the drain. Use a toothbrush to scrub around the edges of the sink.

• For a deeper clean on the surface and drain of a stainless steel sink, mix baking soda and lemon juice together and scrub it onto the surface, then pour the rest down the drain.

• For a porcelain sink, spray the sink with hydrogen peroxide and let it sit for at least 15 minutes, or up to a few hours. The longer you let it sit, the more stains it will remove. Rinse away with warm water, scrubbing if needed to remove further stains.

• Avoid cleaning the sink until you’re sure you won’t have to use it again.

6. Remove all the food from your refrigerator. Give away food that will go bad, like milk or meat, to a neighbor, and store or throw away the rest. This will allow you to defrost and clean the refrigerator without anything in the way.

7. Unplug the refrigerator and let it defrost. Pad the inside with newspapers or towels and lay some on the floor around the bottom of the refrigerator to catch any water runoff. Let refrigerator and freezer defrost for several hours and dry the interior completely before you start cleaning it to prevent mold from growing.

8. Clean the freezer. Use a rag or sponge with soapy water to clean the interior and the rubber door seal. Wipe it down one last time with a clean rag or paper towel.

9. Clean the refrigerator. Scrub down the exterior, starting on the top and working down. Pull out the refrigerator shelves and wash them with soap and water, leaving them out to air-dry afterwards. As the shelves are drying, clean out the interior of the refrigerator with a clean rag.


6 Gross Things That Happen When You Don’t Clean Your Apartment

Unless you’re a total neat freak, you probably put off cleaning around the house until absolutely necessary. Laziness strikes — and so does the dust — and before long you’re living in total filth. When that happens, it’s normal to take pause, look around, and wonder what gross things will happen when you don’t clean your apartment.

You might also wonder how much longer you can put things off. And the answer is — not long. That’s because cleaning isn’t only about keeping up appearances and not having to panic when a surprise guest stops by. It’s about staying on top of household chores — like taking out the trash and emptying the fridge — for the very sake of your health.

Like it or not, gross things do happen. And when they do, your apartment can become a little biohazard of dirt, germs, and allergens. You can only sit around for so long with trash piling up and dust accumulating before things get out of hand.

So if you haven’t cleaned in a minute, or you’re wondering how much longer you can go before scrubbing the toilet, then here are some gross things that just might inspire you to get out the mop.

1. Dust Mites Will Move In & Make Your Allergies Worse

Giphy

If you don’t dust or vacuum, your apartment will turn into an allergen festival. Pollen will gather in the nooks and crannies, pet dander will lie in wait, and dust mites will come out in force. Basically all things that make your eyes water and your nose run will be chilling out on surfaces, and making your allergies worse.

None of it is good, but in my opinion, the worst offender on the list is dust mites. According to an article on ApartmentTherapy.com, “Dust mites (actually, their excrement) are responsible for the majority of year-round allergy problems in the bedroom. They live in soft surfaces, and dust, and come out to eat the skin cells and oils we all shed throughout the day.” Gross.

When To Clean

If you suffer from allergies, then you’ll need to dust at least every week. You’ll also want to kill dust mites by washing all your bedding in hot water and cleaning the floors with a HEPA-filter vacuum, especially in the spring.

2. Your Bathroom Will Become A Biohazard

Giphy

Bathrooms can seem sort of self-cleaning. I mean, the shower is full of soapy water, the toilet flushes, and the sink washes away all those toothpaste stains. So really, the whole room basically takes care of itself, right?

That’d be nice, but sadly it’s not the case. In fact, it’s quite the opposite. The wet environment makes your bathroom the perfect place for mildew, as well as gross (and dangerous) molds. According to Chanie Kirschner on MNN.com, “Mold is a form of fungus that is found all around us in the natural environment. However, when there is moisture indoors that isn’t dried immediately — such as when there is leakage or flooding — mold can grow inside, too.” Yikes.

When To Clean

After every shower, turn on your bathroom vent to help dry out the room. And prevent molds from cropping up by washing surfaces and tiles with disinfectant sprays at least once a week. If you already have something growing around your sink and it looks like black mold, then you’ll want to go ahead and call a professional. This stuff is toxic, so you shouldn’t clean it up by yourself.

Try: Lysol Multi-Purpose Cleaner with Hydrogen Peroxide, $3.79, Amazon

3. Those Sheets Of Yours Will Rot

Giphy

OK, maybe they won’t rot. But sheets are pretty good at collecting oils, dirts, and other questionable stains. As Kristen Sturt noted HuffingtonPost.com, this is especially the case if you’ve been sick, if you go to bed without showering first, or if you sleep naked. These habits dirty up your sheets way faster, and make frequent washing even more necessary.

Try: Gain Liquid Detergent with Original Scent, $5.99, Amazon

When To Clean

Wash your sheets once every week to two weeks, and more often if you’re sweaty, naked, or sick.

4. The Trash Will Attract Bugs

Giphy

Taking out the trash often feels way harder than other chores because it involves going outside where it’s often cold, and where it’s necessary to wear pants. But don’t let this deter you. An overflowing trash can, and/or one that is dripping with leaks, is bound to attract ants, cockroaches, or worse.

When To Clean

Take out your trash bags as soon as it gets full (or even before if it’s smelly), and clean up any spills or drips that have gathered in the bottom of the bin.

5. Your Fridge Will Grow Creatures

Giphy

I know, we all have the best intentions when it comes to eating leftovers. But more often then not, they get pushed to the back of the fridge to rot. When that happens, mold and bacteria can start to grow, and you really don’t want these things hanging out by your food.

It’s not only about spoiled leftovers, however. You can make your fridge even more germy by simply using it. According to an article on About.com “Removing smelly items reduces odors and cleaning the spills improves the look, but what isn’t readily visible is the bacteria that accumulates in this food storage area between thorough cleanings.” Sigh.

When To Clean

Wipe up spills as soon as they happen, throw out expired food ASAP, and give the whole fridge a thorough weekly cleaning with a disinfecting spray.

Try: Seventh Generation Multi-Surface Disinfecting Cleaner, $10, Amazon

6. Animals Will Live In Your Clutter

Giphy

We all know spilled food and crumbs attract bugs and mice. But did you know animals like to live in clutter, too? Yes, even “well-organized” clutter. Because really, they just want to hide and will look for houses with lots of places to do so.

The worst part though, is that mice can bring disease. In fact, one mouse can carry up to 25 different diseases, such as the deadly Hantavirus. Suddenly all those piles of books and magazines don’t seem worth the risk.

When To Clean
This one may be quite the undertaking, because you really should de-clutter your entire place. That includes your basement, if you have one, as well as your closets. Do a big yearly spring clean, and get rid of junk once and for all.

It may not be fun, but cleaning your apartment is imperative to your health. Doing so will prevent little gross things from moving in and making you sick, so do it often.our place is brand new or freshly vacated, so it should be clean, right? Not necessarily. If the house has just been built a whole home clean is necessary to remove any remaining dust or chemical residue that comes with construction.


Tips to wipe out germs in your home

Germs and bacteria are everywhere, including the place you strive to keep the cleanest: your home. To shield against germs, consumers are spending more than $1 billion annually on antimicrobial products, according to the Environmental Protection Agency.

“Because of viruses like H1N1 and other household germs, consumers are taking every precaution necessary to keep themselves and their families healthy, and that starts at home,” said Jackie Cooper, spokeswoman for Eureka, the vacuum manufacturer. “With consumers looking for products that will help keep the germs and bacteria at bay, there are now many options available to create a healthy living space.”

Cooper suggests the following tips to achieve a clean and germ-free home:

Don’t let them in. Many germs and bacteria make their way into your home by tagging along with you. Once in the house, these microorganisms have a nice, safe place to grow and multiply. Cut germs off at the door by keeping antimicrobial wipes or hand sanitizers near the entrances to your home. This way you, and your guests, can fight bacteria on the spot.

Vacuum often. Tackle the germs that have been tracked into your home by using a vacuum with a bacteria-fighting solution to not only suck up dust and dirt but also prevent bacteria from growing in or on the vacuum as well. Be sure to change your vacuum filter and bag regularly to reduce the number of allergens and other particles released back into the air. If these items are not changed regularly, the vacuum’s performance can be compromised and dirty air can be expelled back into your home.

Beware of the kitchen and bathroom. Don’t forget that germs also like to hang out in places like the kitchen sink where pathogens such as salmonella and E. coli can be found. Although well-intentioned, the kitchen sponge you use to clean is only helping to spread those germs throughout your kitchen. To kill germs on the sponge, the U.S. Department of Agriculture recommends microwaving it on full power for one minute. To protect your hands from germs, keep bacteria-fighting soap near the sink to use when working in the kitchen.

Another popular germ hangout is the bathroom, where they can be found in toilets, showers and sinks. One simple step to cut back on germs in the bathroom is to make good use of the toilet lid. When a toilet is flushed, spray can land up to several feet away from the actual toilet, allowing viruses and bacteria to land on items such as a toothbrush or hand towel. Take a few extra seconds before flushing to close the lid and trap harmful bacteria inside